Regular readers of this blog (are you there?) or of my Instagram will know that, for a few years now, my biggest sewing ambition was to sew a pair of jeans which actually fit me properly. You’ll also know that I managed this part way through 2019 bit have not yet managed to blog about them. Story of my life!
I did consider not blogging, but then thought it might be helpful for others who have the same ambition and have also built it into THE BIGGEST MOST UNACHIEVABLE DREAM EVER and are therefore not diving in!
I’m not going to lie: it took me a lot of work and a fair few classes to get these babies to fit. I think it was all worth it though, and not just for my jeans making: I learnt many valuable skills along the way too.
The magic pattern
Unsurprisingly, the winning pattern for me was the Closet Case Patterns Ginger Jeans. Such a cliche, I know! But there’s a reason this is so popular in sewing circles: they are really well drafted and the instructions are pretty clear too. I’d recommend it as a starting point for anyone. The version I actually worked from was the mid rise, stovepipe leg jeans.
Step one: spend money on patterns
I started my sewing journey by simply buying the pattern. And then buying the Morgan pattern as well (not being the biggest skinny jeans fan in the world). And then I bought the Deer and Doe Safran (on the grounds that their patterns fit me really well). And then I put them on my pegboard, where they stared reproachfully at me for WAY too long.
Step two: download jeans fitting ebook from Closet Case Patterns
I downloaded the ebook as a starting point : there are lots of details of fitting adjustments etc you might need. At this point, this just scared the hell out of me, but such is life!
Step three: buy the online course
After the patterns had stared at me for quite some time, Closet Case Patterns had an offer on online courses and, after hearing many good things, I bought the jeans making course. This actually comes with the midrise pattern (or I think you could pick the Morgan – I picked the midrise purely as it’s the only version I hadn’t already purchased!) The course is split into many different lessons, and I hoped it would hold my hand nicely along the way.

In many ways, it did exactly that. After asking around on Instagram, I bought some stretch denim from eBay (Brunswick Mills, I think) and decided to crack on. I picked a size based on my measurements and dove into printing out, adjusting and cutting out my pattern.
If you do this, do make sure you’ve watched the beginning of the course, or at least read the pattern instructions carefully before you begin. There is a specific way to lay your pattern pieces out on denim which will help prevent the legs twisting around whilst you’re wearing them like crazy things!

I made what were my standard adjustments at the time ( which basically involved grading between different sizes on the waist and hips) and followed the course carefully.
I love that course. In terms of construction process, it’s the best I’ve seen: you literally watch Heather doing every single step required to make your own jeans in real time. This means that you can pretty much sew along with her. She demystifies all the new techniques involved and breaks them down in really simple ways, whilst giving you options at various points along the way. She also demos various nifty little gadgets (more on that later).
I followed along happily and ended up with A PROPER LOOKING PAIR OF JEANS! I was so damn excited.
And then I tried them on. They were at least 2 sizes too big and required a belt to hold them up. Not what I was looking for AT ALL.
Step four: curl up in a ball and doubt your abilities
This totally crushed my jeans making ambitions for quite some time. I convinced myself that I was totally inadequate to the task and reverted to sewing some t-shirts.
Step five: pull up your socks and book onto a pattern drafting course
Again, time passed by and I got annoyed with myself. In typical me fashion, I didn’t build my confidence, I just found another way to spend money! I booked myself onto a six week evening class for pattern drafting.
At the first class, my heart sank when I realised that, instead of “properly” drafting blocks based on our measurements, the teacher intended to have us adjusting commercial block patterns to fit us. This felt like a total cop out.
It wasn’t. It was precisely what I needed. In the real world, I don’t have lots of original design ideas. What I have is a vast supply of commercial patterns and a desire to make them fit me. And now, following about 18 weeks of the course (I kept booking for the next 6 weeks because I was enjoying myself), I had a MUCH better idea of what adjustments my body is likely to need and how to apply them to the patterns I buy.
For the record, I need to;
- grade between sizes from bust to waist and possibly from waist to hip
- drop my shoulder by 1cm at the neckline, grading to nothing at the sleeve point, to account for my hollow chest
- scoop out the crotch curve a little more
- add at least 1.5 – 2cm to the length of the CB seam to allow for my bum
- Curve the waistband. Like, A LOT. And possibly remove some fullness from the back yoke. Again, big bum problems.
The frustrating thing for me here is that NONE of these adjustments are particularly large. You wouldn’t think instinctively that 1.5cm would make much difference. It really, really does.
Armed with my new knowledge, I returned to the Ginger jeans pattern. I started by sizing down (I worked from a size 8 in the end), I graded, I curved that waistband A LOT and I tried again.
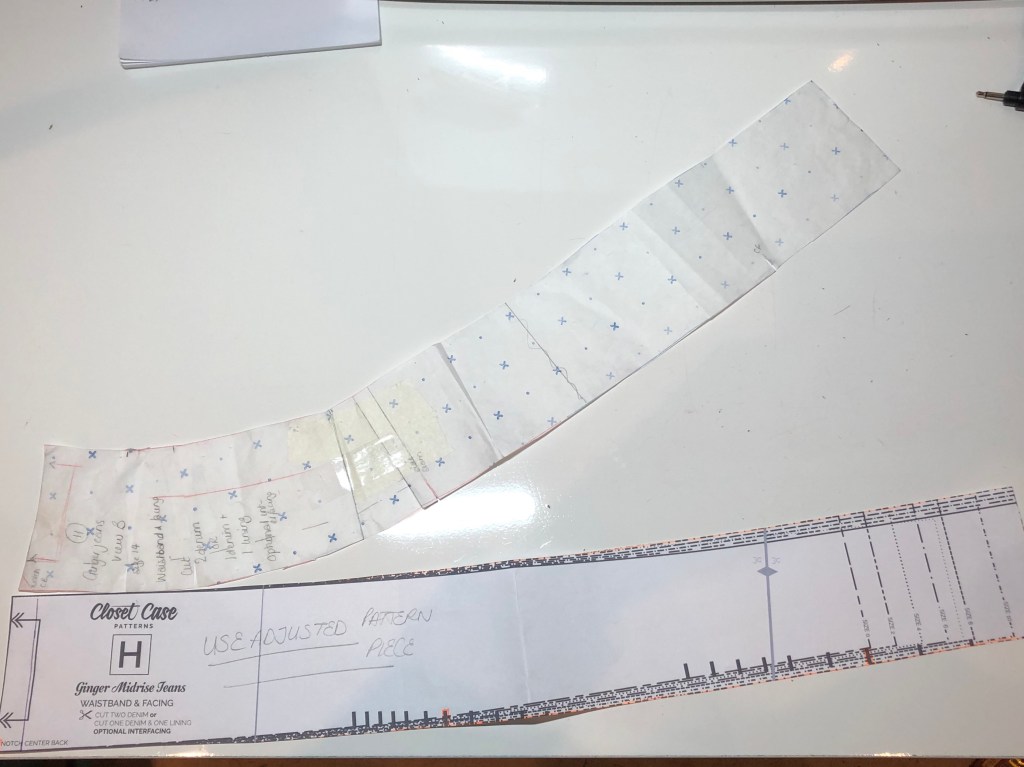
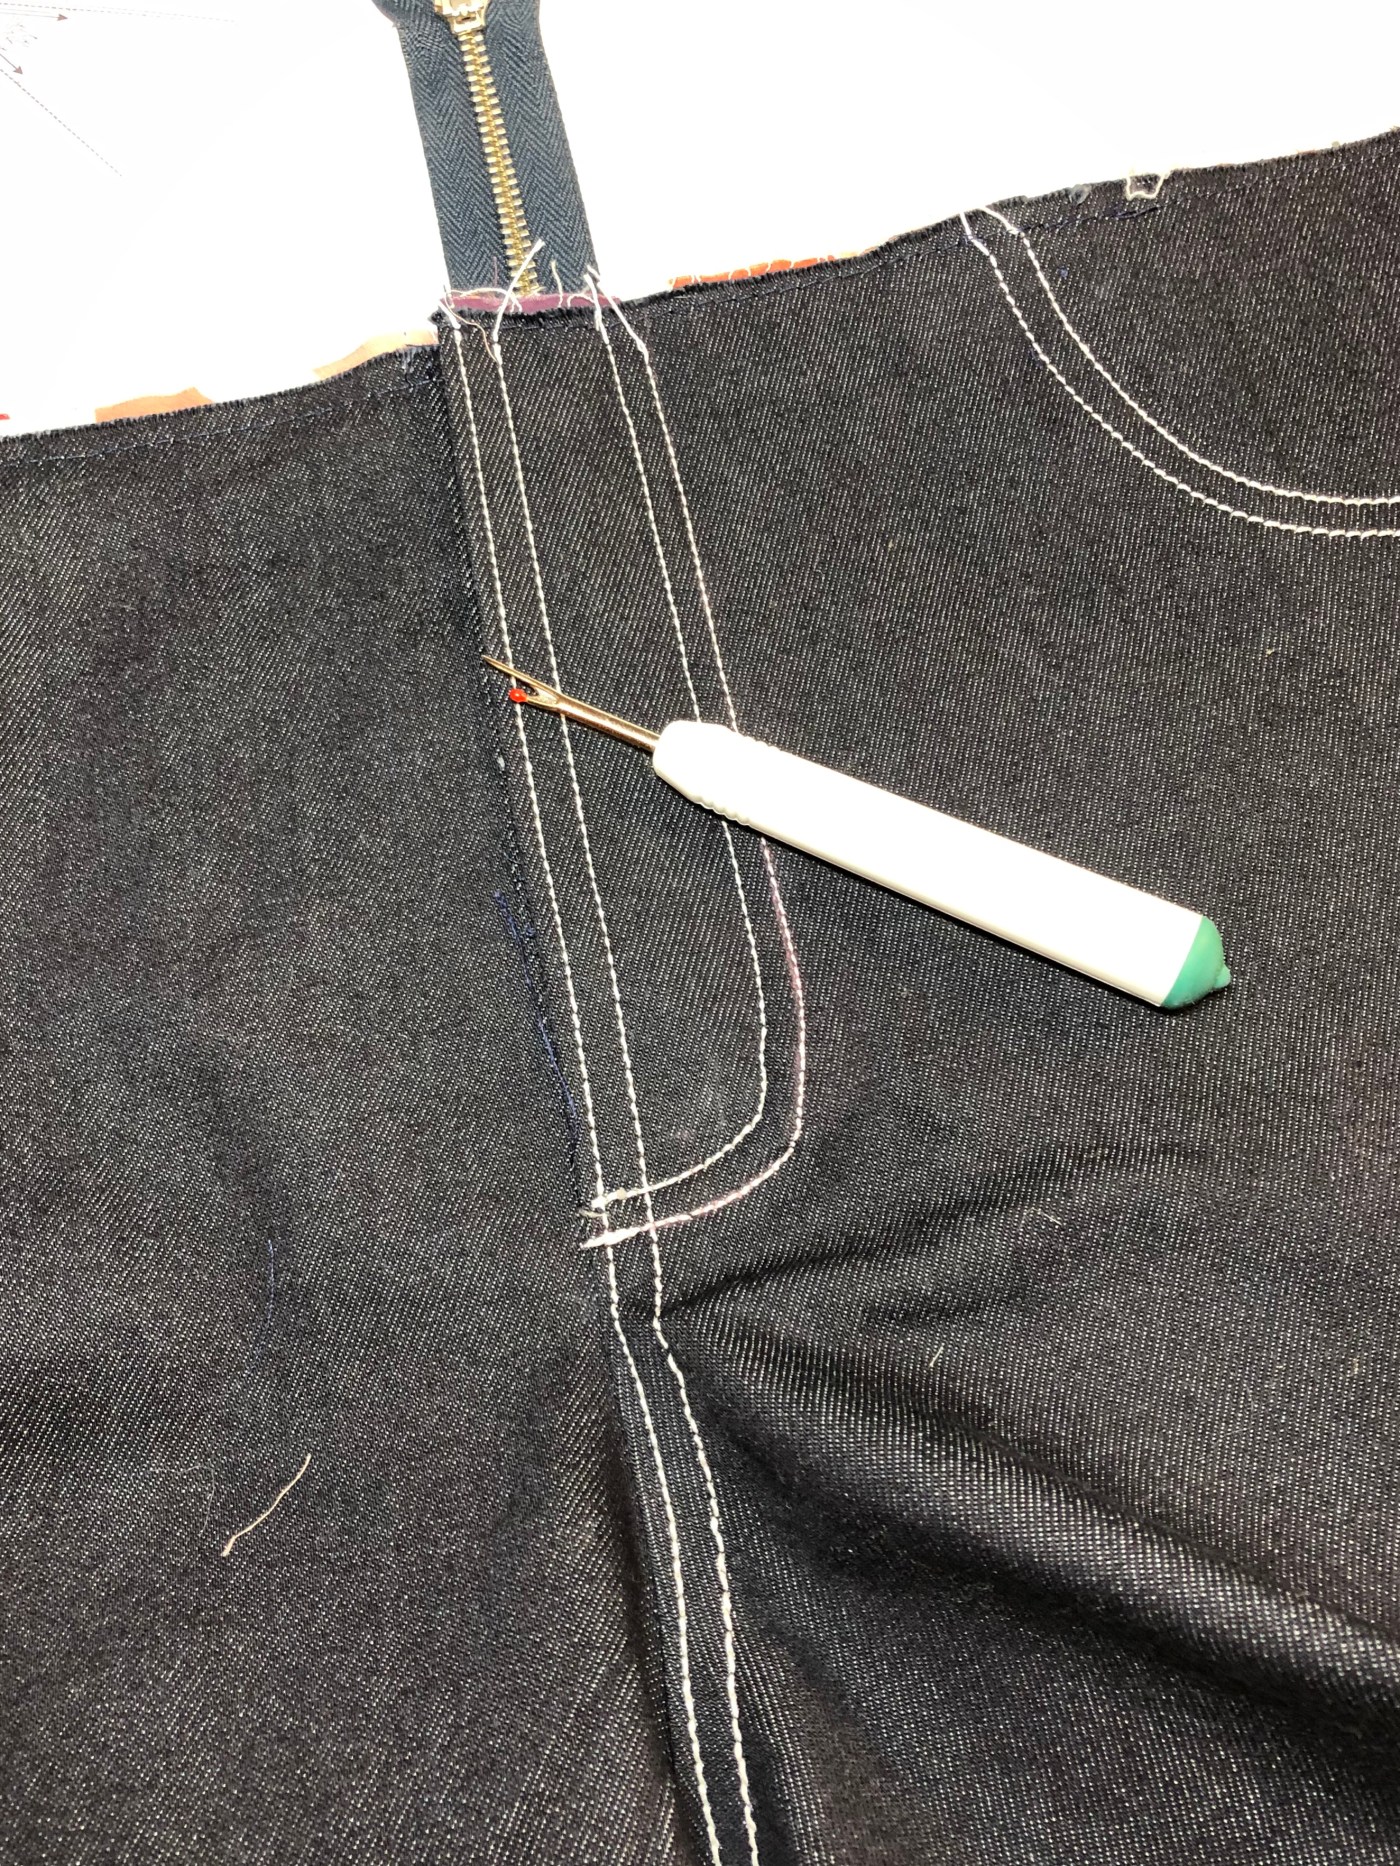
Below: unadjusted waistband pattern piece
Step six : delay a little more and buy some gadgets!
For a gadget lover like me, gadgets are one of the best things about making jeans. SO MANY NEW TOYS! For the record, the ones I’ve found helpful are a hump jumper (to stick behind the pressure foot to make it easier for the machine to deal with the many layers of fabric at the seams), an awl (perfect for making the necessary holes for jeans buttons and rivets), a Chaco chalk marker (really great for making marks on rougher fabrics like denim), a buttonhole chisel (because that denim is pretty tough to get through with a seam ripper!), some form of pliers like the Prym Variopliers to get that button through the denim, and also a magnetic wrist pin cushion.

OK, that last one isn’t specific to jeans making, but I spotted Heather wearing one in the online course and HAD to have one!
And finally, after using the one which Heather had somehow got through airport security, a mini anvil really does make getting those buttons hammered on a lot easier (and way, WAY more fun!)
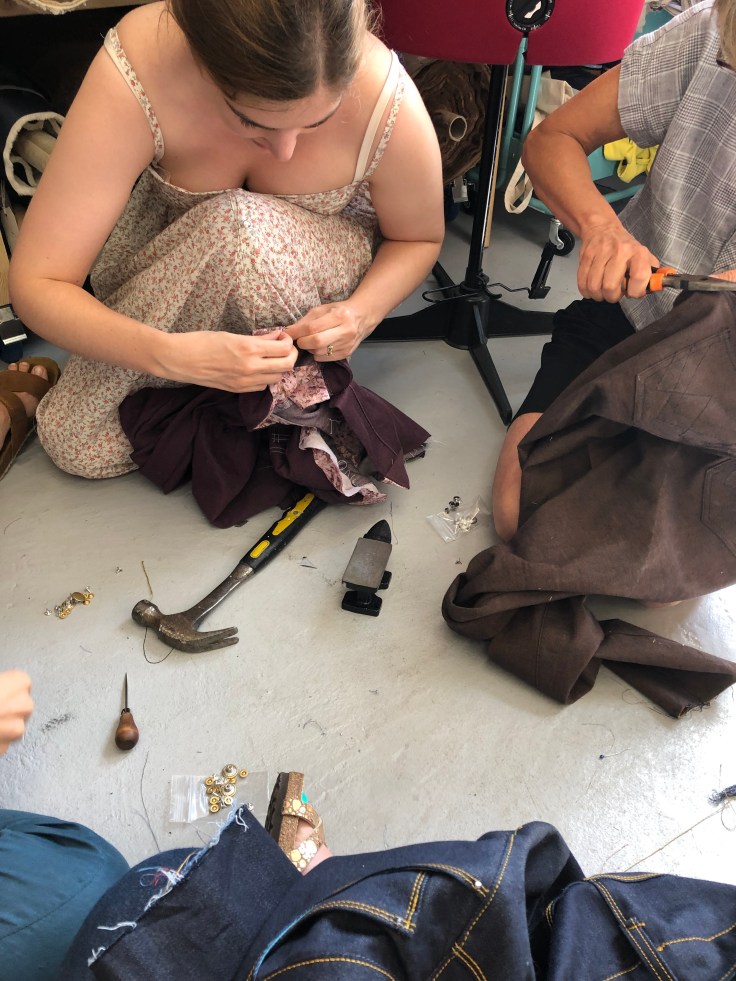
Step seven: enlist some friends
I cut out a new pair of jeans, basted them together (ALWAYS baste fit. ALWAYS. Every single time.) and headed off to the Stitch Room Sewcial with them, hoping to get some help in fitting them. Because fitting trousers on yourself is just a nightmare!

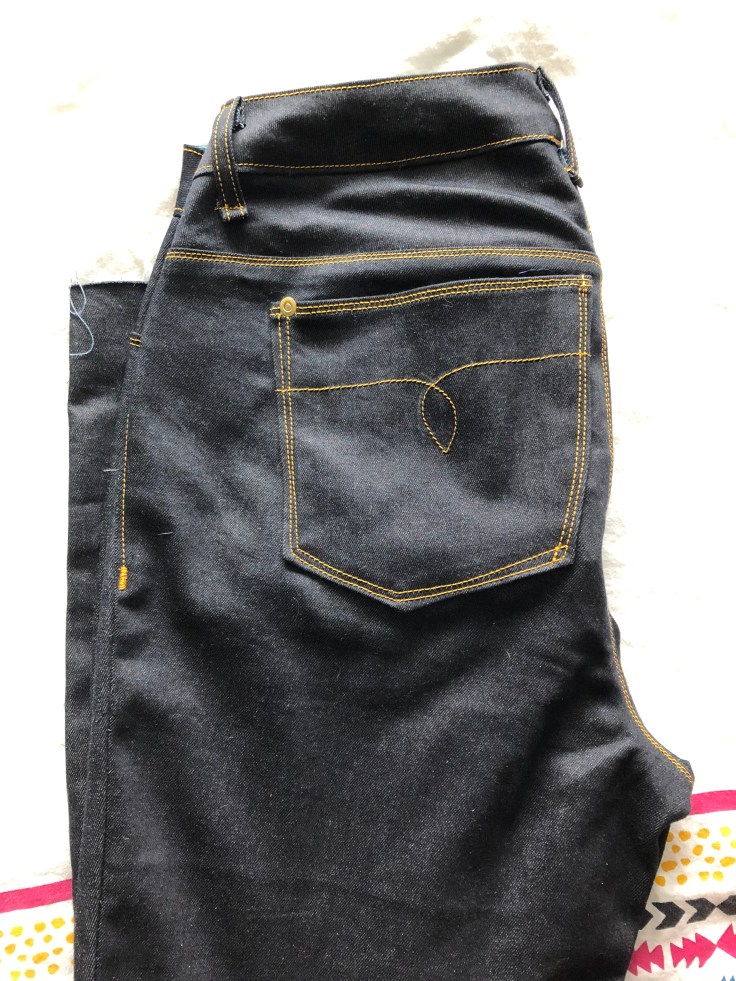
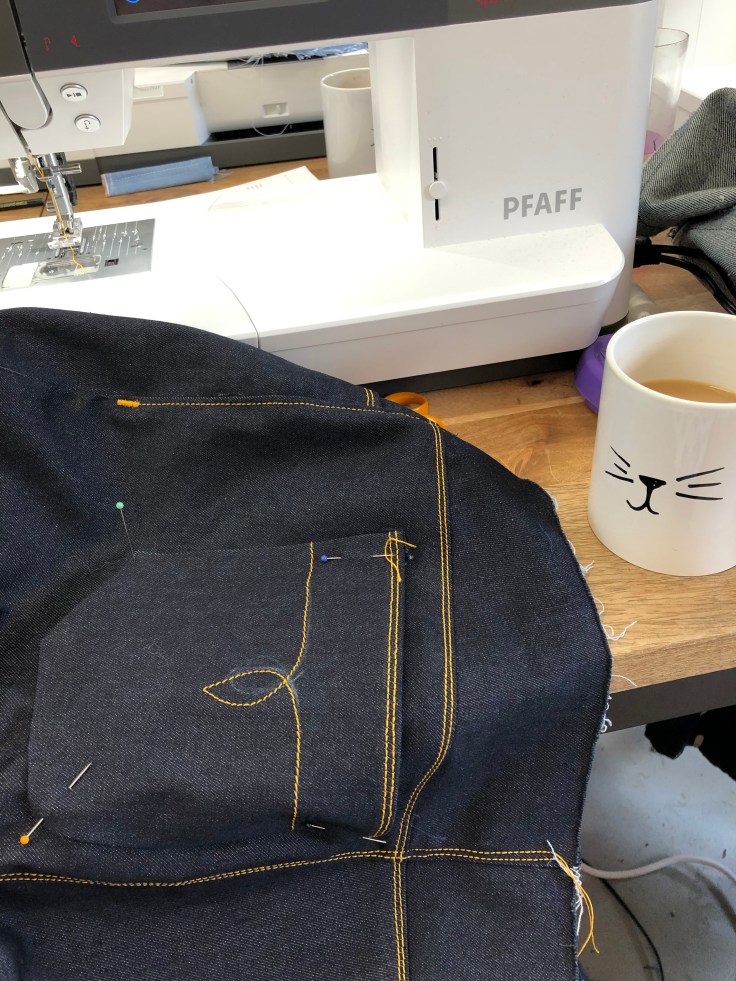
Heather Arnatt very kindly helped me pin fit the jeans, and Bee helped me embroider THE BEST BACK POCKETS THERE HAVE EVER BEEN. I set off home to sew them up.
And nearly cried when, after wearing them for a day, I realised they were still way too big.
I nearly gave up for good at this point. I was totally out of ideas and didn’t know how on earth to further adjust things so that they fit.
Step eight : spend more money on another course
At this point, on my birthday, I got an email saying the New Craft House was hosting another series of jeans making courses run by Heather Lou. Well, what’s a girl to do?
I have a thing at work where, if you pay money in from your salary each month, my employer pays in half as much again and you can then use the total amount to pay for learning of any kind. I had already established that you could use this for sewing courses (because of the pattern drafting) so I knew I could use what was the best part of three years of savings to pay for the New Craft House course. So I went for it.
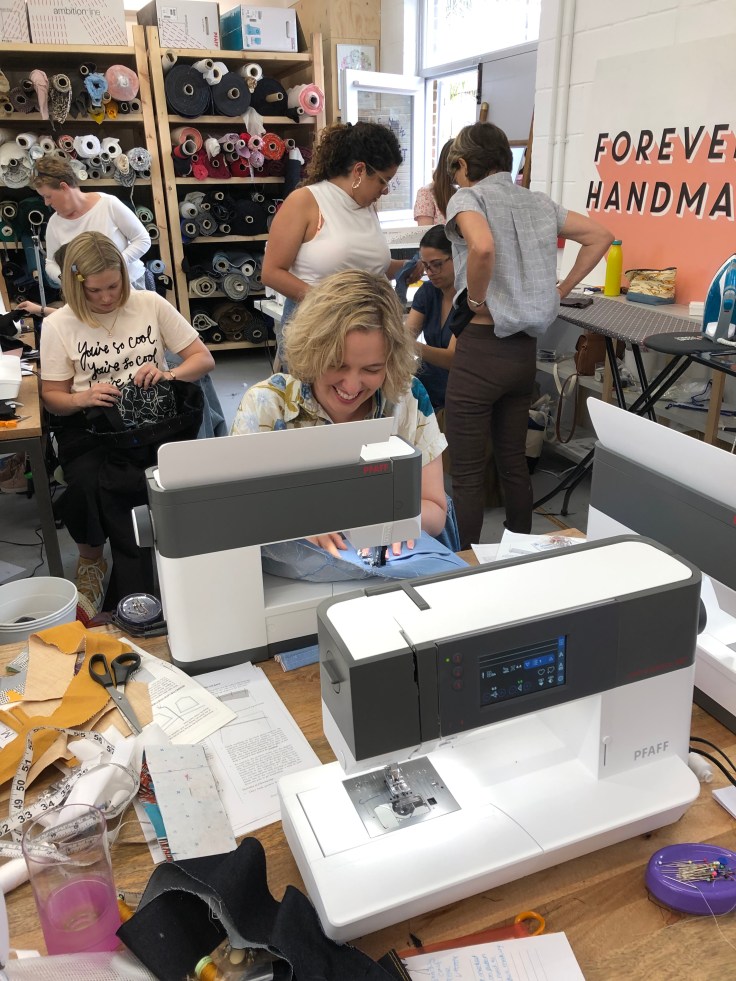
The course itself was a bit of a mixed experience. There were a few things that really annoyed me at the New Craft House. Things like, when we arrived on day 1, they had two overlockers, neither of which was working. As a Pfaff ambassador, Heather spent several hours on them and got them going in the end, but I didn’t really think that was what I’d paid for – I wanted time with her, not time in her vicinity whilst she repaired machines.
The much vaunted new, shiny Pfaff machines weren’t great to use: I had loads of problems with skipped stitches, thread jamming and other annoying crap, to the point where I chose not to finish my jeans because I couldn’t face forcing the so called super machine to go through the hems. Whilst fishing yet another thread jam out, I noticed that the inside of the machines were beyond filthy; no wonder they weren’t working smoothly. I know workshop machines take some hammer, but at the prices charged I did think someone should have cleaned them out at least once a week. I know several others on the course had the same experience.

Anyway, that aside, the workshop was worth every penny in terms of getting access to Heather’s know how. She is so down to earth, so dedicated to getting you past perfection to a completed pair of jeans, and her extensive experience means she can literally glance at you and tell you what adjustments need making to get a lot better fit.
So where had I been going wrong?
With hindsight, my main problem had been a lack of experience of baste fitting a pair of jeans. I had not considered that, when I wear my jeans, I like them snug. I want to feel them holding me in. And obviously, if you want the finished garment to fit like that, they’re going to have to feel that way when you baste fit.

I had been checking that they “fit” in the same way I would expect a normal, non-jeans pair of trousers to fit, which is to say, a lot less snug. So they obviously didn’t fit like jeans need to when finished.
On top of the adustments I’d already made, Heather had me scooping out the back crotch curve more, scooping out the front crotch curve and taking a little more out of the waistband. Some of these adjustments were in the range of 1/8″; again with the amazement that this makes so much difference.
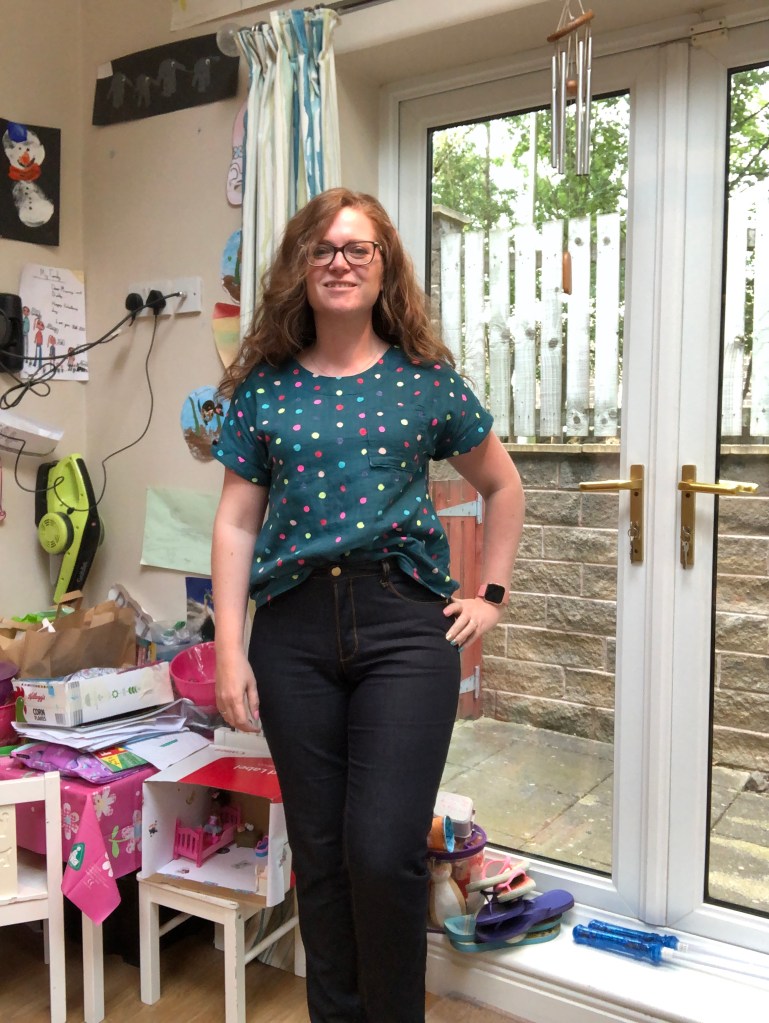
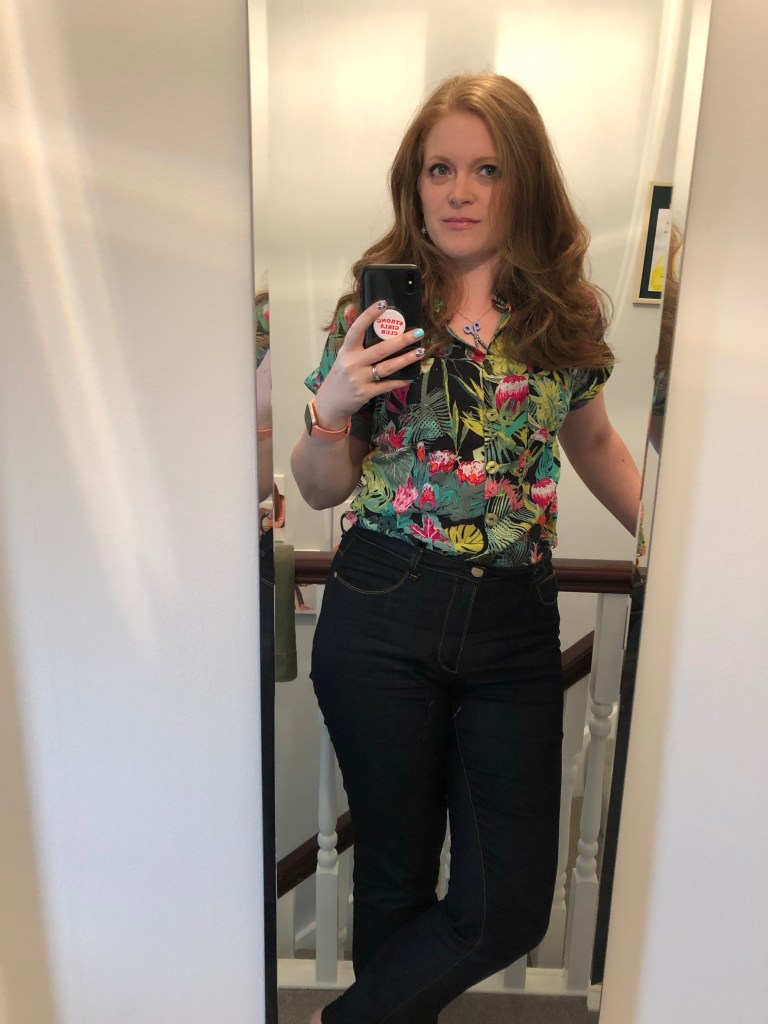
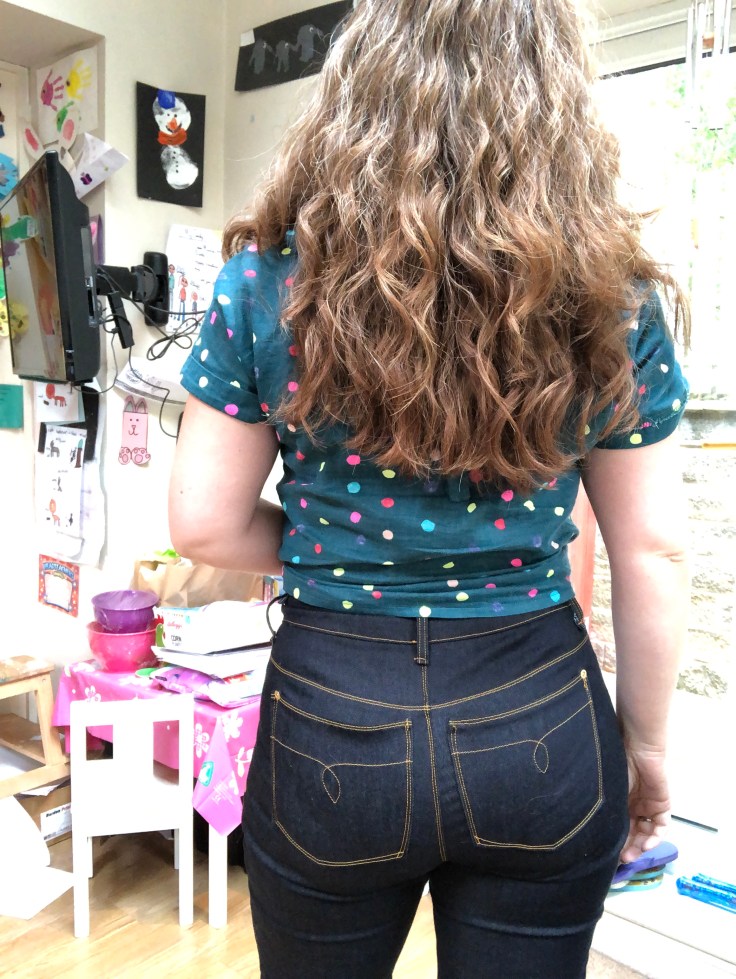
The final jeans are hands down the best fitting pair of jeans I have ever worn. I mean, they should be; if you add up all that learning, they’re also the most expensive! But they’re amazing.
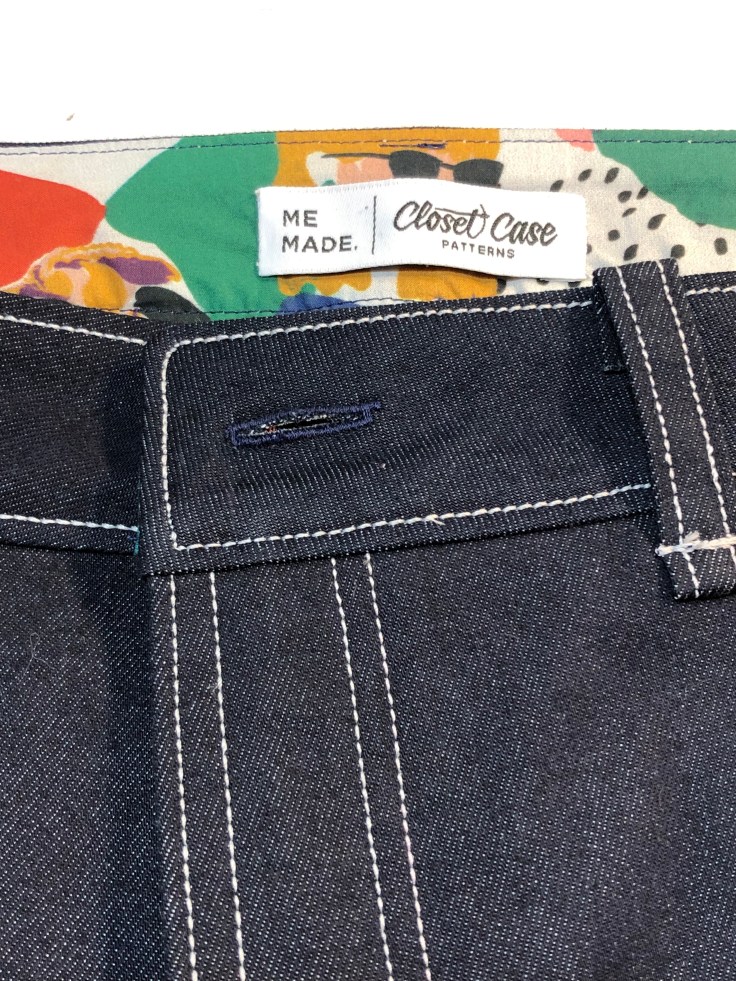
I chose to line my waistband and cut my pocket bags from African wax print, an excellent choice which gives me true joy every time I wear them. The only thing I’ve done differently in the two pairs I’ve made since is to interface the waistband, which I find gives me a much better result.

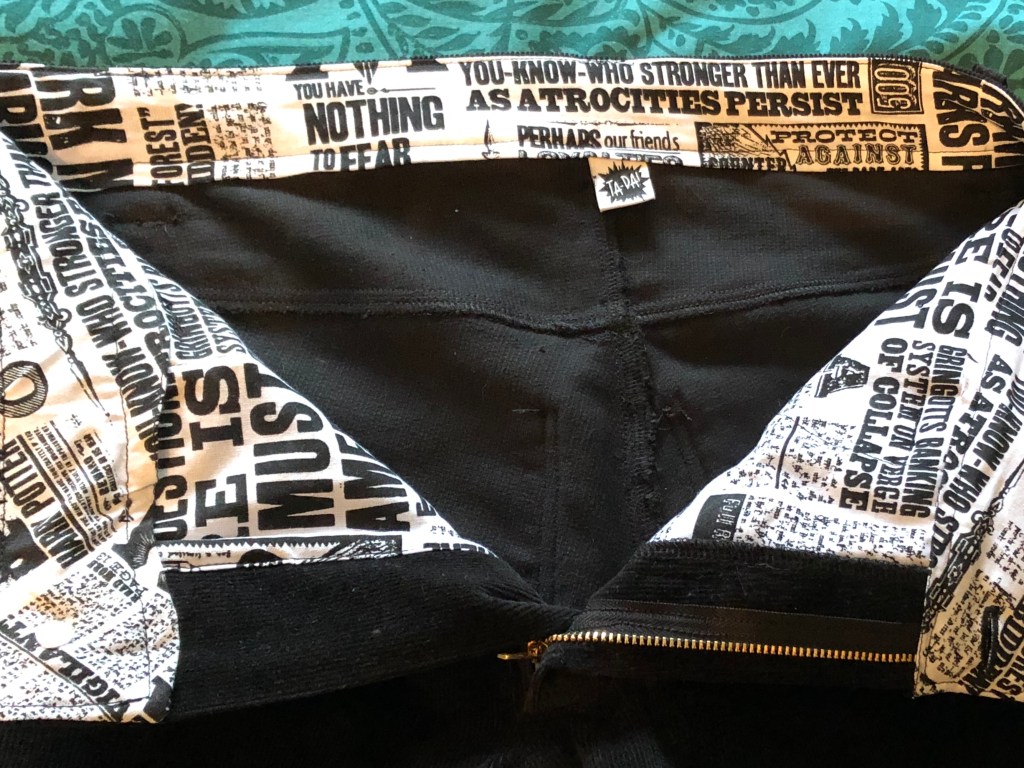
The best fitting pair is actually the second pair post course: the first pair are a little loose around the waist but the rest of the fit it great. In my final pair (which are stretch black needlecord, lined with Harry Potter cotton!), I remembered that fit fault when basting and went back to remove just a little more from the side seams before sewing them up for real. The only other thing I did differently on this pair was to use Gutermann Denim thread instead of topstitching thread, and it was amazing. I ended up constructing the entire pair with the denim thread, and I had absolutely no problems at all with skipped stitches or thread nests when topstitching. I highly recommend trying it out if your machine is a little temperamental with topstitching.
Was it all worth it?
Hands down, unequivocably yes. I feel like I can take on the entire world when I’m wearing a pair of jeans I made for myself. I no longer have to hoist them up at the back or wear a belt to ensure my colleagues don’t get a flash of my knickers! They are so damn comfy and I love them so much.
And I have genuinely learnt so much along the way, and not just about jeans. All that effort makes the final product worth so much more to me.
I can’t recommend jeans making enough; give it a try!
Becca x
Details
Pattern Closet Case Patterns Ginger jeans
Fabric stretch denim from New Craft House / stretch denim from eBay / stretch needlecord from Bobbins and Bolts
My measurements
Bust: 36″
Waist: 32″
Hips: 42″
Size cut 8
Adjustments made curved waistband: graded at the hips: added length to CB seam: scooped out crotch curve front and back
Future adjustments? Probably: every denim is different and Heather was adamant that even she baste fits every single pair every single time
Make again? Yes! I am superwoman!


Like you I attended the New Craft House course with Heather, as you experienced the overlockers were constantly breaking down and was always a queue to get on the working one. Heather was fantastic but our class had too many students I felt so was a lot of waiting around and then last minute panic to get as much done as possible. I did pick up a few tips and made another pair of jeans after the course. I then tried Megan Neilson Ash jeans which fitted me well virtually straight out of the packet! They have become my go to pattern. As I am 5 ft. 10 inches with long legs virtually impossible to buy from shops so am delighted.
LikeLiked by 1 person
I’ve heard great things about the Megan Nielsen jeans patterns: I’ve actually got the Dawn jeans pattern and am working my way through adjusting the paper pattern. Fingers crossed they work out well for me!
LikeLike
You ARE a super woman, well done! Out of curiousity, how much did you end up curving your waistband by?? x
LikeLiked by 1 person
Massively! I’ve added a photo in for comparison.
LikeLiked by 1 person
Awesome post! Really inspiring, glad you got your perfect pair in the end 😀
LikeLiked by 1 person
Thanks! 😊 you can tell I got properly annoyed by it, it wasn’t going to beat me!!
LikeLike
Wow, what an epic journey. So glad you got to the end result you wanted and now all the jeans patterns in the world need making in all the fabrics 🤩. (A real shame that the New Craft House weren’t more professional and organised at that price – I wonder if Heather could be persuaded to teach somewhere further north another time…?)
LikeLike
Now that would be lovely!
LikeLiked by 1 person
Loved this!!!! And nice to see your pics from the workshop – brought me back. Anyway, what a great story. It is indeed really useful to actually think about how many ‘steps’ (or face palms!) can go into making a final garment!! I also feel your ‘big bum’ pain, my Ginger waistband looks just like yours!
LikeLiked by 1 person
😂 it’s quite ridiculous in some ways how different we can be from the standard pattern: but also fab that, with enough perseverance, you can make things work for your body!
LikeLiked by 1 person
HOORAY! I love a happy jeans ending! If you think of it as in investment in a style of pants that has been continuously popular for 60 years it seems pretty wise to me (and hopefully you enjoyed some of your time as well). Perfect pocket placement, by the way!
LikeLiked by 1 person
I found your blog post about jeans-making so helpful. I’m currently making a moto-style jacket (Hey June Evergreen Jacket) which is a big step up in complexity for me. If it goes well, I may be courageous enough to try making a pair of jeans, and I will definitely refer back to your blog. Thank you for sharing your trials and tribulations. Well done!
LikeLiked by 1 person
Thank you so much, that’s lovely to hear! I’d definitely say give jeans a go: just maybe be prepared to make more than one pair 🙈
LikeLike
I am about to make the Ginger jeans, my first attempt at jeans (and second go at trousers). This post is really helpful. Did you stick with the view A (low waist, stovepipe leg) for your final pair? They look great. I’m already stuck at choosing which view to go for.
LikeLike
Thanks! So these are the stovepipe leg, mid rise pair: I think the mid rise pattern came with the online course but I know there’s a blog post somewhere where Heather shows how to make that adjustment if you have an early copy of the pattern without the mid rise
LikeLike