
A little while ago now, Nina Lee released her latest pattern, the beautiful Park Lane dress and top. I was lucky enough to have tested this pattern and have since made two further versions, so I thought I’d share my thoughts.
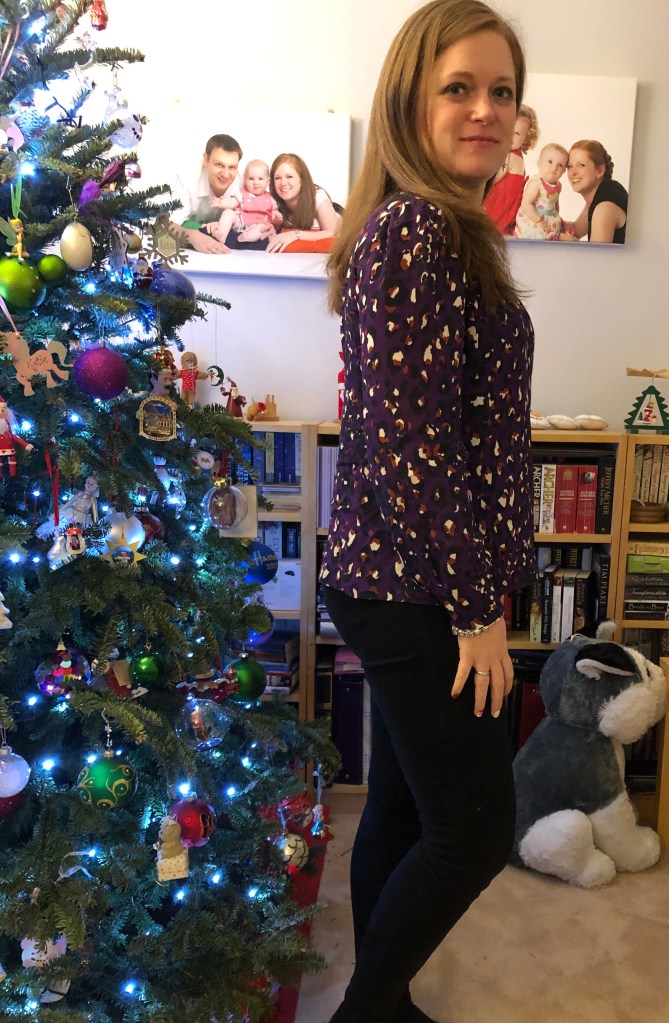
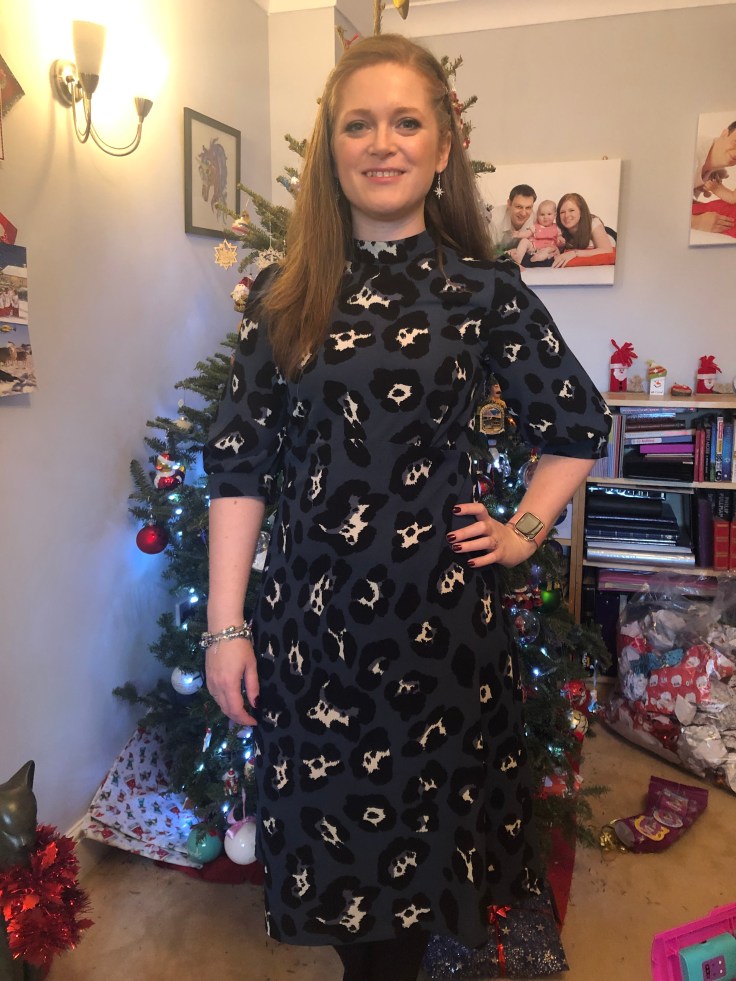
The Park Lane pattern includes both dress and top patterns which are subtly different from each other. The top features bust darts: the dress has gathers coming from the front waist seam. There are two different necklines, three different sleeve options and an optional ruffle, so you get a lot of pattern for your buck.

I was thrilled when the email asking for testers arrived because I’d been searching all over for pretty much this exact dress. It’s a style I’ve seen all over the high street this autumn and I really like its prettiness.
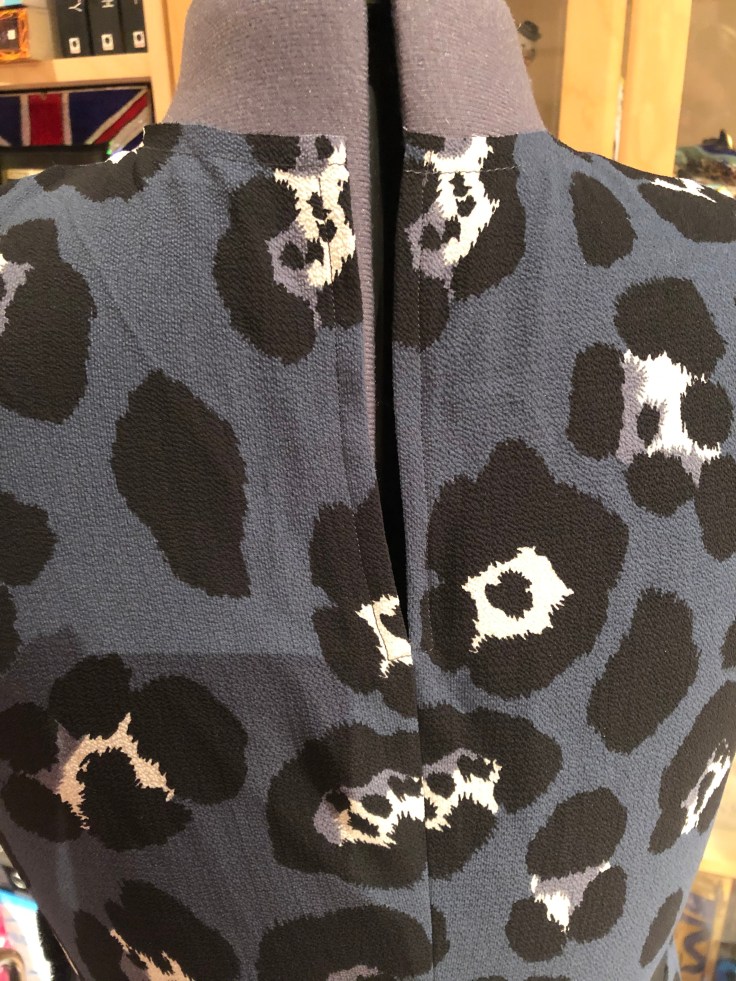
It has some nice little details, such as the back neck opening and the side seam zip on the dress, both of which may test you a little. But I like that in a sewing pattern; it’s great to try something a little different and the instructions here are really clear.
In all three of my versions, I graded between a 10 on top to a 12 at the waist and hips. I totally forgot to make my usual large bum adjustment and seem to have got away with it (more on that in a minute) but after the first version, I went in and added 1″ to the bicep on the sleeve and the whole thing fits so much better now.
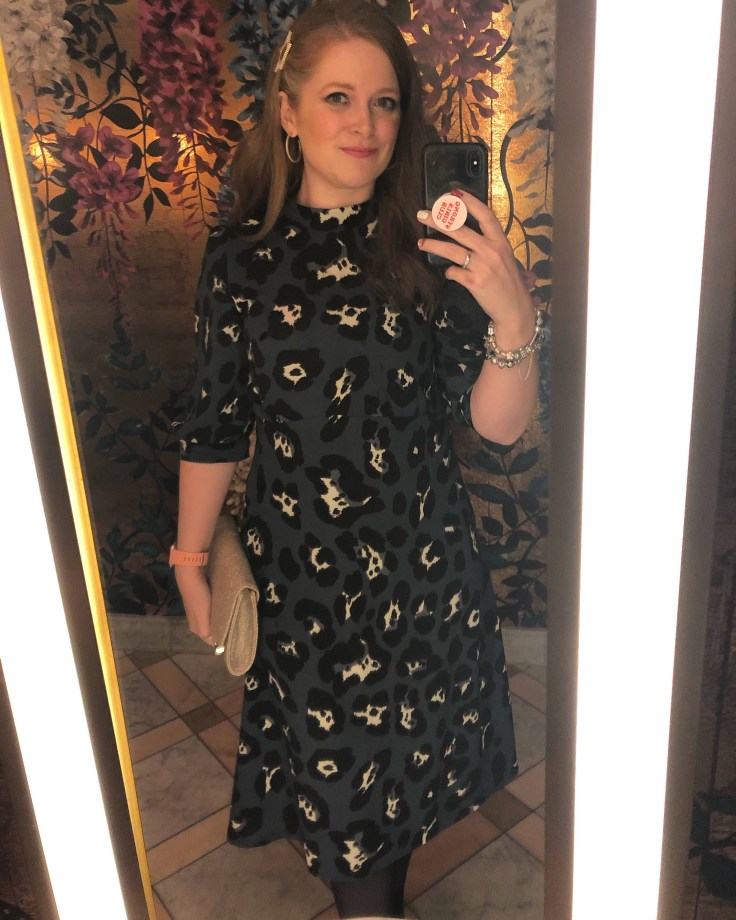
All three versions have the little collar on (rather than the faced, collarless neckline which is also an option) and I really love this finish. The only thing I would say is to check carefully that both sides of the collar at the back finish the same size and shape: I was in an almighty rush making the top verison and let’s just say I will be wearing it with my hair loose at all times!

Drape is absolutely key to this pattern in my mind. I’ve made a polyester version and two crepe versions and I don’t think any of them would have worked so well with more body to them. This does make things rather trickier to sew (as ever!) so I had a few tips to share:
- First up, cut carefully, possibly on the single layer, and use a rotary cutter and mat if you can. The lack of need to lift the fabric whilst cutting makes a massive difference to how accurately I cut.
- If making the collar, I’d recommend block fusing the piece which is interfaced. To do this, cut a piece of interfacing slightly larger than the pattern piece requires and fuse it to your fashion fabric BEFORE cutting out. This allows you to get the fashion fabric properly on grain and keep it that way, and vastly increases your chances of ending up with a piece of fabric that’s roughly the same size and shape as the pattern piece!
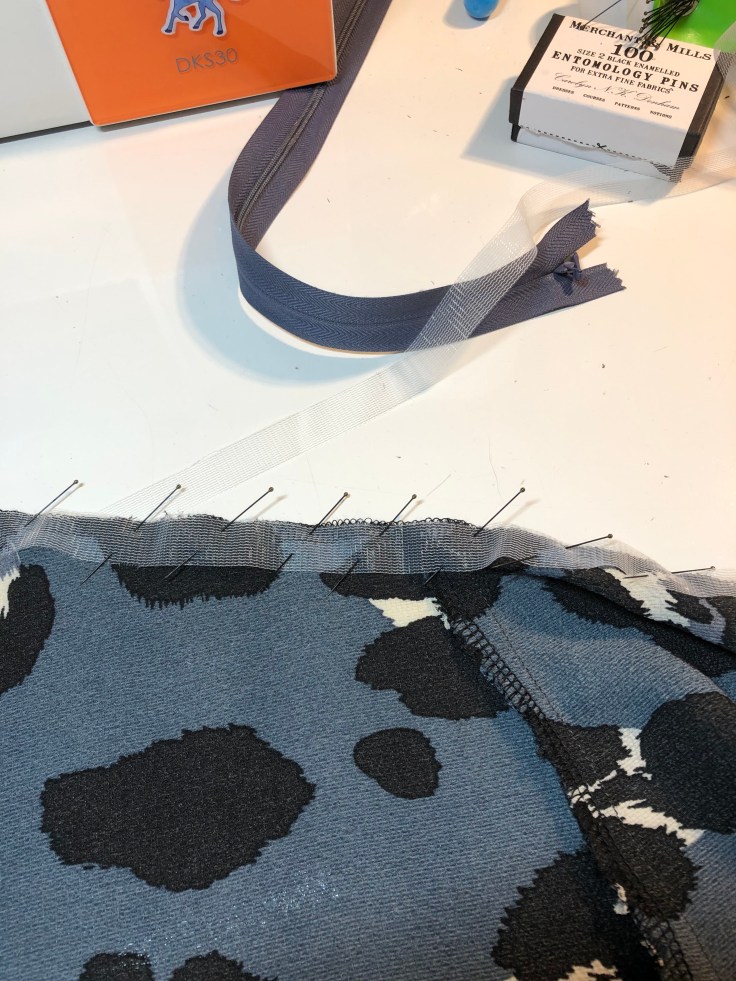
- If you’re making the dress, I would go for some kind of stabiliser on the seam where the zip is to be attached. I used seam tape interfacing which was sewn in within the seam allowance, but a strip of iron on interfacing would have worked just as well. It’s going to make sewing that zip in so much easier. I also hand basted the zip before sewing, to prevent it shifting about under the machine.
- Again, if you’re making the dress, I highly recommend assembling it up to the point where the skirt and bodice are attached and then leaving it to hang, either on a hanger or a dress form, at least for overnight. I think this is probably the reason I got away without a full bum adjustment on this dress. I was amazed how much the hem had dropped by and would definitely not have got a good finish to the dress if I’d not left it overnight before hemming.
- I made the full length sleeve with placket for my top version and I added some extra interfacing to make my life easier. I do not have the best record for getting great plackets in place, so decided that for this super slippery, fraying prone fabric, I would add interfacing to the placket pieces and to the area of the sleeve where the cut went (if that makes sense). I did worry that this would add too much bulk, but using a very light weight interfacing was enough to make the shole placket process much easier and you really can’t tell now that it’s made up. I would definitely do this again!

I love how fabric efficient this is; even with long sleeves, the top fit onto 1.5m of fabric easily and the dress with the mid length sleeve can be cut from 2m of fabric (yes, I know I said 1.5m on Instagram, I got overexcited!) I still think that getting a midi length, sleeved dress from 2m of fabric is pretty good going, since I have top patterns which are more fabric hungry than this!
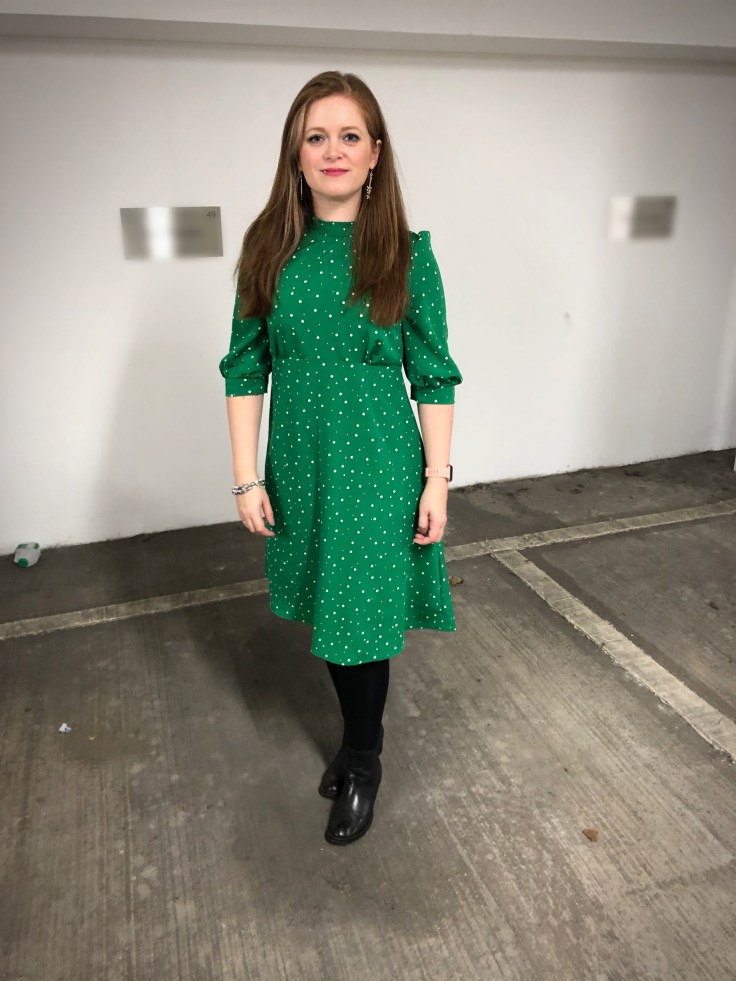
I also don’t think you need to spend the earth to get the right type of fabric: my green, tester version of the dress was made up in some polyester mystery fabric I picked up at SewBrum for £3 a metre and I got a load of compliments on it. Paired with a leather jacket and boots, it is the perfect going out dress.

The crepes I used for the second dress and the top were more expensive, but they do feel amazing. The fabric was probably slightly sheer to be used for a dress, but I’ve worn it with a slip each time and felt absolutely fabulous. Also, I bought “matching” boots; I’m blaming Amy Scarr entirely for having bought leopard print boots, I would never have considered them before my Love Sewing photoshoot but got so many compliments, I’m converted!

I have at least one more top version mentally lined up, with fabric ready to go, and I wouldn’t be at all surprised to find more versions of the dress appearing in my wardrobe. It’s super comfy to wear and it feels really classy and flattering: what’s not to like?
Because Nina is especially lovely to test for, she has provided me with a second copy of the paper pattern to give away to one of my readers; to be in with a chance to win, head over to my Instagram and comment on the prize post as per the instructions!
Good luck!
Becca x
Details
Pattern Nina Lee Park Lane dress and top
Fabric mystery green polyester from Sew Brum / grey leopard print crepe (I think from Sew Me Sunshine? but possible Fabrics Galore) / purple leopard print crepe from Fabrics Galore at the Knitting and Stitching Show
My measurements
Bust: 36″
Waist: 32″
Hips: 42″
Size cut 10 bust grading to 12 waist and hips
Adjustments made 1″ full bicep adjustment made to the sleeve in addition to the grading mentioned above
Future adjustments? Nope; it’s perfect
Make again? Yes; fabric is already lined up for at least one more top version but I can see myself using this many more times.


Loving all of these, the green one is my favourite. That fabric is gorgeous.
LikeLike