Hello! Me again! Just for once I have ten minutes to throw a blog post together very shortly after completing a make: the children are at gymnastics and the house is in such a state that I don’t know where to start. So I’m not going to; instead I’ve nipped out into the sunshine, grabbed some photos of my latest make and sat down to write about it.
Again, sorry, I know that must make you feel incredibly valued!
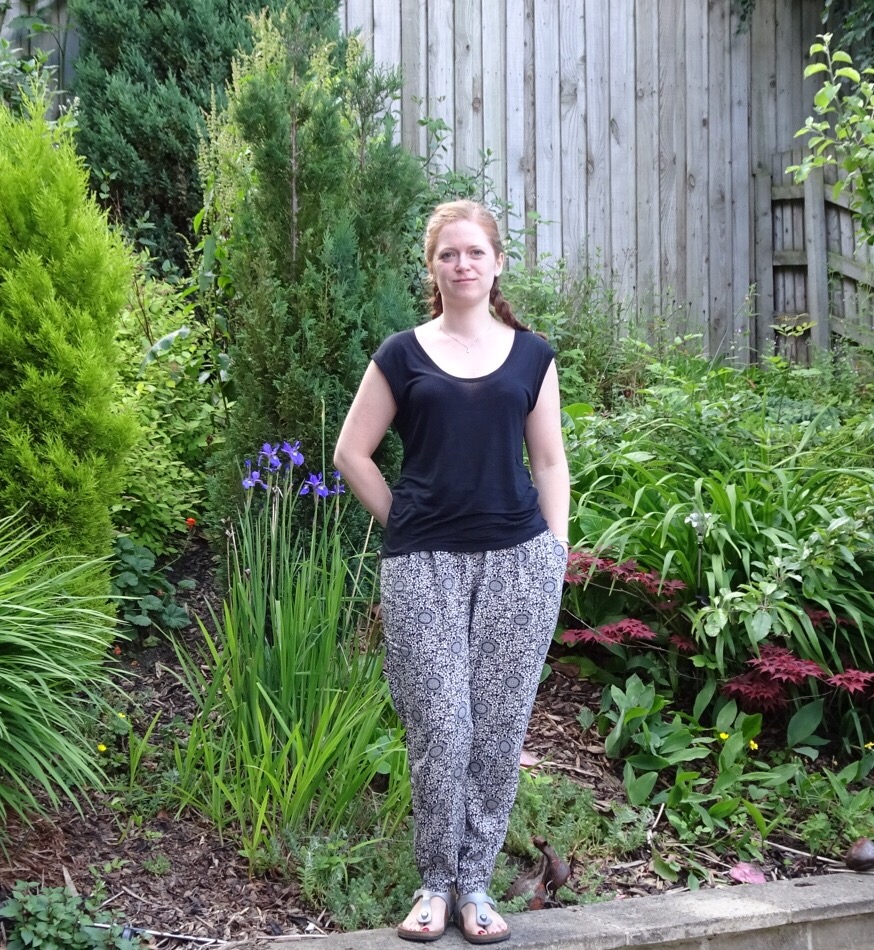
So my latest make is the Carrie trousers which is one of two patterns included in the new online course from Sew Over It, The Ultimate Guide To Sewing and Fitting Trousers. I have wanted to go on the class for the Ultimate trousers for some time; my first blog was about my attempts to make these trousers alone and although I was quite pleased with myself at the time, they aren’t great.
The problem is fit. I am far from being standard in shape (aren’t we all!); personally I have a large bum. There is currently an 11″ difference between my waist and hip measurement and most of that extends out backwards rather than sideways, if you get my drift! Still, I’ve always been a huge Queen fan and they always liked a Fat Bottomed Girl 😉
So when I saw that the class had been released online with a new pattern and an initial discount I decided to invest despite owning one of the patterns already.
As the holidays are looming and I’m desperate to wear less of my jeans on working from home days, I decided to work from the beginning of the class and do the Carrie trousers first. These are touted as being the simpler option to make and fit, not least because they feature an elasticated waist.
Lisa Comfort looks amazing in hers
But then I feel Lisa Comfort could probably look incredible in a bin liner! Nevertheless I decided that this shape of trouser is everywhere at the moment, people with much larger arses are wearing them without a care in the world, so it was time to step outside the comfort zone a little and make the drapey trousers.
Gulp!
I ordered some Black and white viscose from Remnant Kings : at £4.99 a metre for the 2 metres required I was ok with adding to the fabric stash a little. I’m generally pretty pleased with their cheaper viscose fabrics and this is no exception, it feels lovely.
My current measurements are waist 29″ hip 40″ so I cut a size 12. This JUST fit into the 2m which I was actually quite pleased about (I may have mentioned my hatred for wasted fabric before now). Unsurprisingly this was not the easiest to cut out: big shock, it’s shifty stuff! Also I don’t often use scissors but decided this was better than moving the fabric around on my cutting mat whilst cutting the legs: clearly my mat is not big enough for a whole leg to fit on and use the rotary cutter as usual.
I ran through the classes relatively quickly, not finding often that I needed to go back and repeat anything. I think the only point at which I was a little annoyed was when it got to cutting the elastic when Lisa blithely announced that you’d need to go back to the size guide to see how much to cut. I don’t print more than I have to and it took me a while to find that particular pdf: I would have found a second link to the same document very helpful there.
The videos are pretty clear and it’s kind of fun to have Lisa there chatting away, telling you where to go next. I followed all of the videos on my phone and found it plenty big enough and clear enough for the guidance I needed.
The pattern itself is great and comes together easily. I really like the pleated front and pockets (who doesn’t love pockets??). I also like the neat way the elastic is fastened to the flat section of the front waistband.
I used the overlocker to finish just about every seam, I can see this stuff fraying like hell given half a chance so did it even where not instructed to by the course. It does give a lovely neat finish inside.
End result?

You will have to pardon my appearance, this is a make up free Becca (you do not want to hear about this morning’s tantrums from the 5 year old, but there was no time for breakfast let alone make up!), so please concentrate from the shoulders down! Also the top is last year’s and rather too large but IT’S ALL ABOUT THE TROUSERS!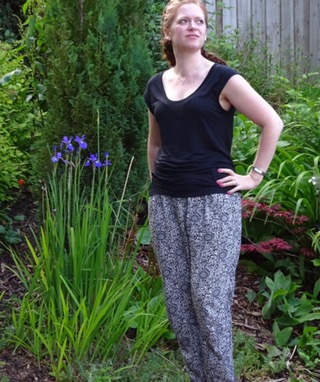
I think my concerns that this shape is not the most flattering in the world for the larger bottomed amongst us were perhaps justified, but i do not care one iota. I absolutely bloody love these trousers!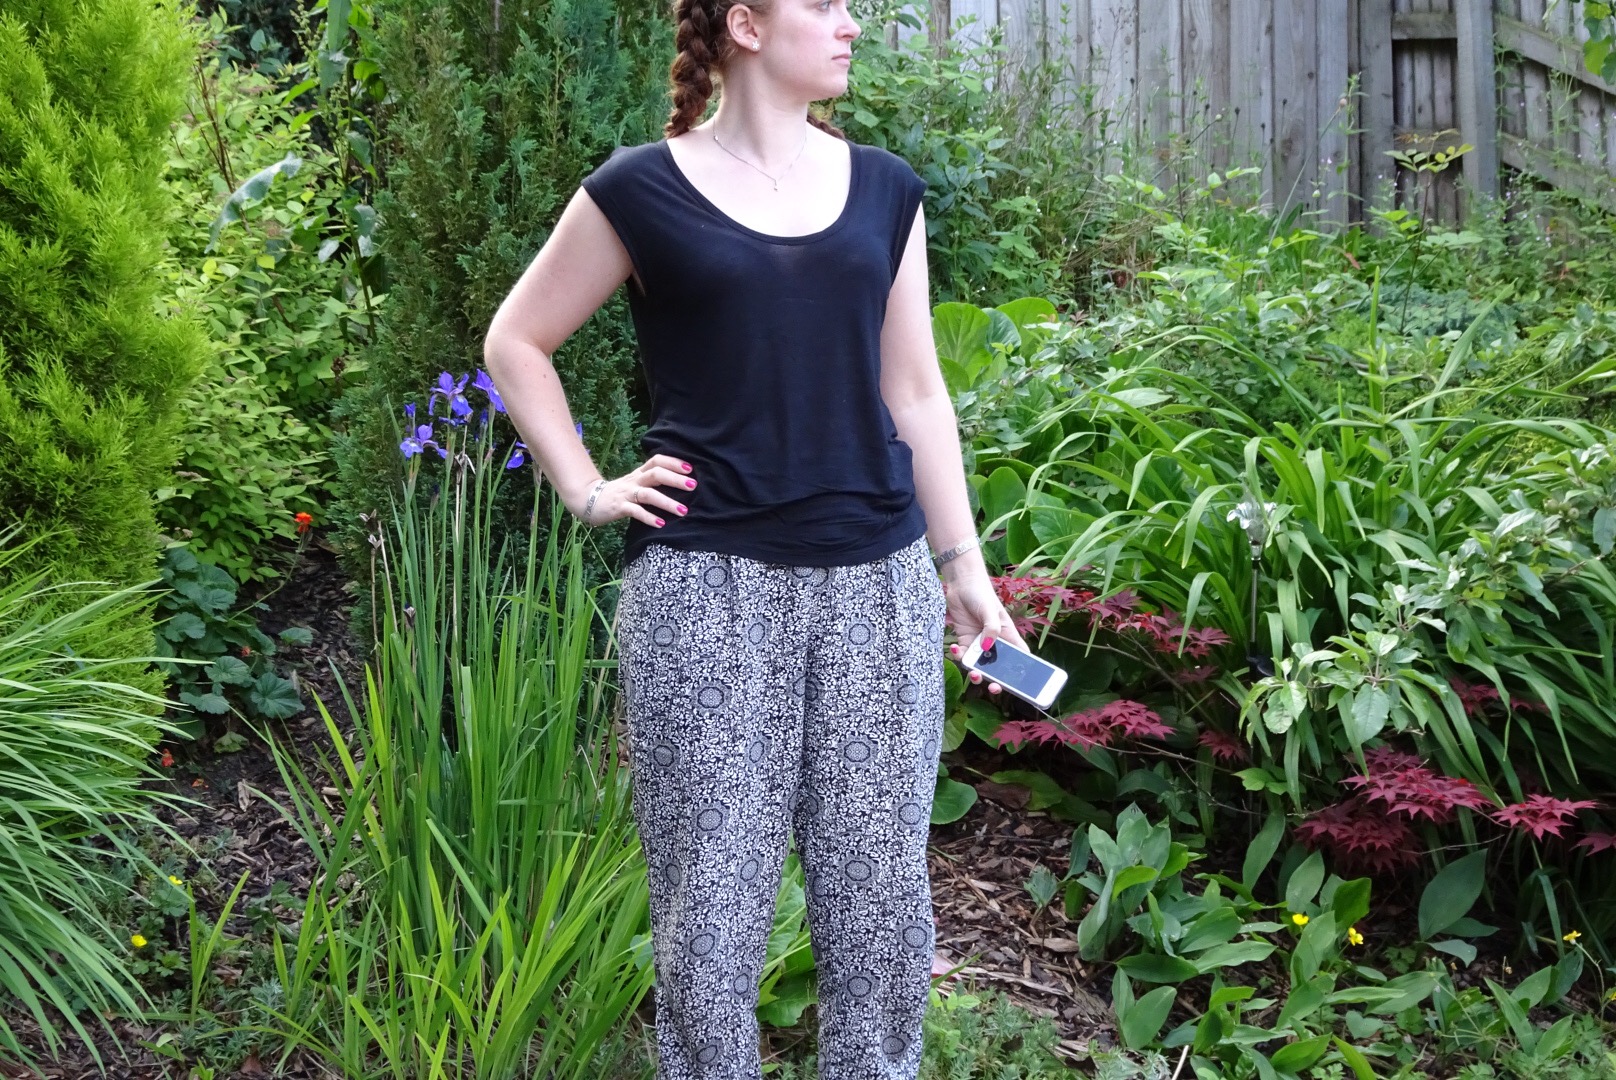

There are pockets. Which are large enough for my phone to be secure. There are little pleats that look stylish.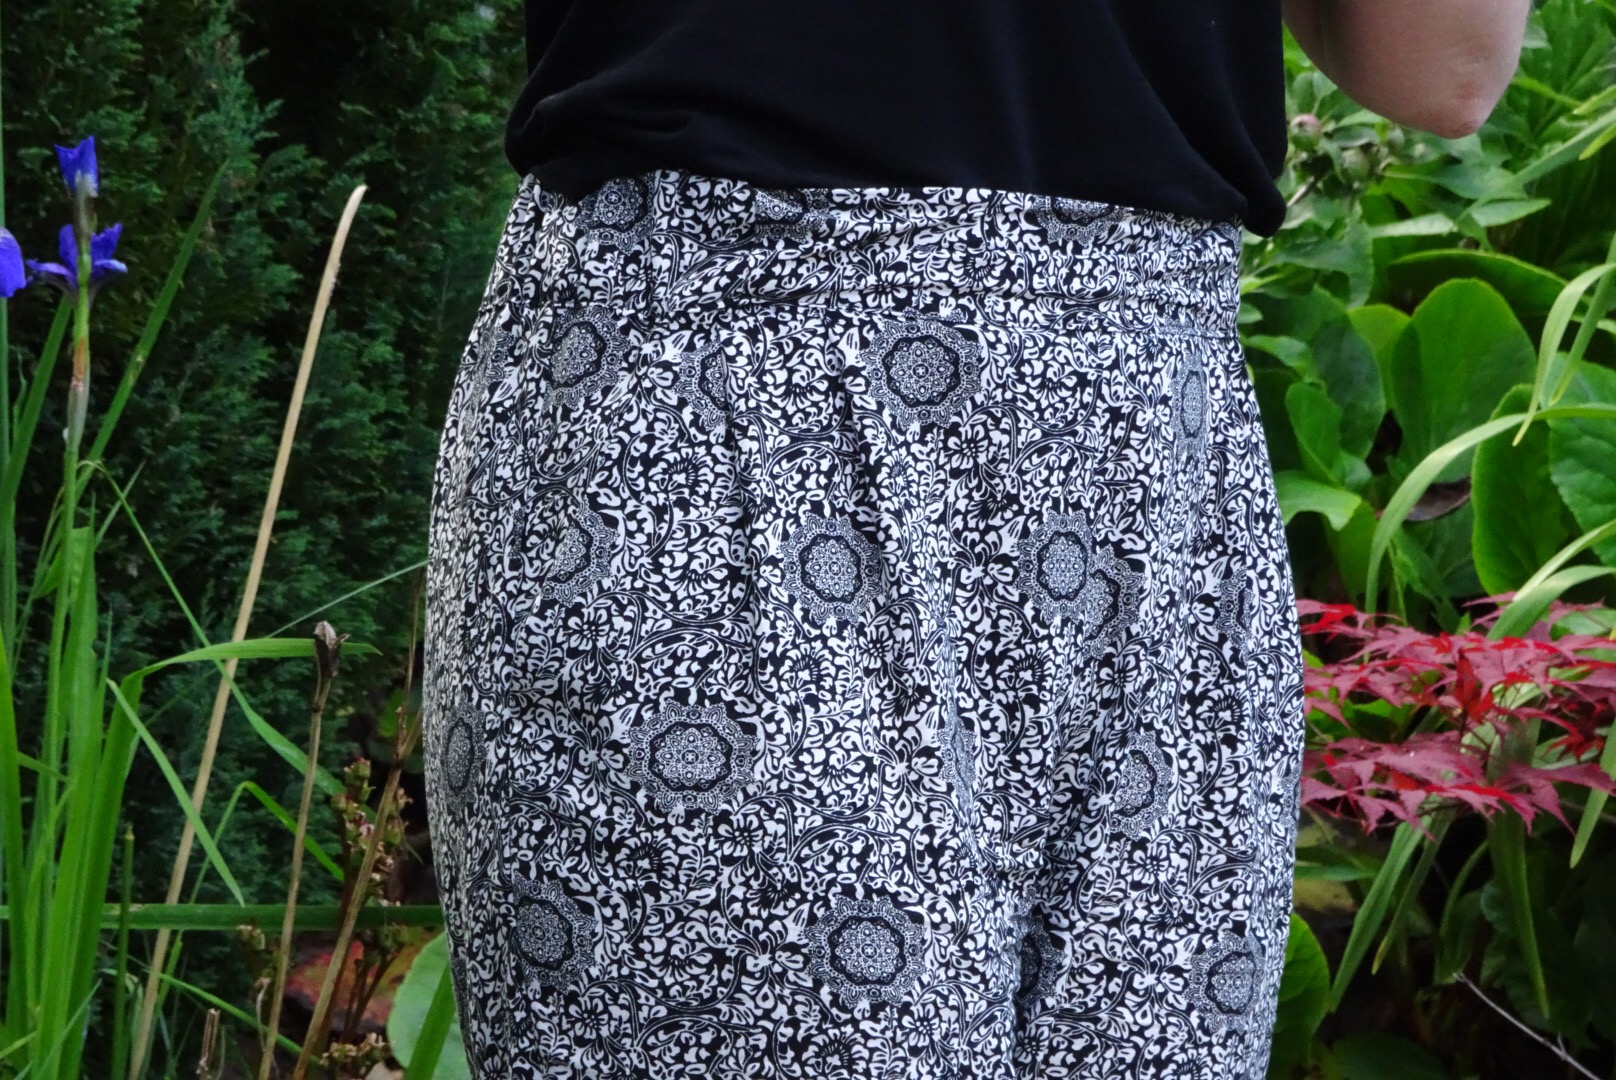

I could have basted this pocket with more care and got it properly flat, it doesn’t quite sit flat even without my hand in, but who cares? It’s all drapey, it’s all fine and I will get it right next time.
Yep, definite emphasis on the bum. Don’t care. Am able to wear comfy, silky, flowy pyjamas in public and receive compliments from friends (thank you Caroline!)
So will there be another pair? Absolutely! I will do a couple of things differently
- I will baste the top of the pockets to the waistband with more care so that they sit flat
- I will not line one side of the front waistband seam up with the first pleat instead of the second pleat and not notice until almost the last stitch 😳
- I will use a heavier interfacing on that flat front waistband: I went very lightweight as I usually would with viscose but I think something with a little more body would look better: you can see how crumpled it is on the photos above
All in all though, this is a superb summer pattern. Even first time through, including cutting out and breaking off for various child related night time issues like checking for monsters under wardrobes and locating missing teddies an entire 2″ from the noses of their owners, I put these together in two evenings which is probably about 4 hours tops. And they are awesome!
How many pairs do you think you can squash into one suitcase?
Becca x


These look fab! I have also bought the online course & just got some fabric to make my first pair – once I’ve put together the PDF, of course! Looking forward to seeing any more you make and thanks for the tip about the interfacing for the waistband!
LikeLiked by 1 person
Thank you! I need to sit through the rest of the course now but that may have to wait a little!
LikeLike
I’ve now made 4 pairs! Love them! But I’ve found on each pair the front of the front waistband gets pulled slightly at the seam where the elastic is – I almost want to secure it down with a top stitch down the seam but that may not look good. Did you find the same?
LikeLike
They look great. Love the fabric too. I also bought the lessons as I figured it’s as near to a class I will get! K xXx
LikeLiked by 1 person
Much smarter than trackie bottoms and look just as comfy. Love your fabric.
LikeLiked by 1 person
Those monsters under the wardrobe are always a worry – and as for missing teddies … so much more important than mummy’s sewing!! Despite all that your trousers look great – and I love your plaits!
LikeLiked by 1 person
😂 thanks Jane, monsters are a recurring problem around here! Xx
LikeLiked by 1 person
Looks gorg! When this was released I thought about purchasing the class but as I already had the pattern for the ultimate trousers (bought days before this release!) I didnt. I wasnt sure about these trousers but reading your post and seeing your pics I am converted. I also have a sticky out bum and think these would work on me.
LikeLiked by 1 person
Thanks Claire! Have you seen Handmade Jane’s review of the class? Gives me great hope that the section on the Ultimate Trousers will really help my sort my fitting issues out!
LikeLike
I am very to tempted to buy this course with patterns, it’s a great idea!! Especially for trouser virgins like me 🙂 yours look fab on and fit really well.
LikeLike
Thank you! I’d recommend it, far less scary than when I attempted trousers on my own last year!
LikeLike
The trousers look great – you can’t beat looking put together and being comfie! Also you look amazing – you don’t need make up and your derriere is petite!
LikeLiked by 1 person
That is the first time my backside has been called petite in its entire life 😂😂😂😂 thank you, lovely! Xx
LikeLike
Love that fabric. I certainly don’t think those trousers make you look big, but quite the opposite!
LikeLiked by 1 person
Aw, thank you, you’re very kind!
LikeLiked by 1 person
Very stylish. The fabric is wonderful. It looks so comfy.
LikeLiked by 1 person
Thank you: it really is so comfy!
LikeLike