
Hi! How’s life going for you this week?
I’m having a rather mixed week: all sorts going on making life hard away from the sewing machine. But good things going on with the sewing, which helps balance things out. Two really exciting things happened very close together: firstly, I won a sewing machine in the Love Sewing Stitcher of the Year competiton, it arrived and I was able I trade it for a lovely new overlocker thanks to Sew Essential. This means I’ve been spending time playing with her, trying to get used to different tension settings etc. She is very lovely but quite different so I’m on a learning curve again.
Secondly, I’ve been invited to join the Minerva Crafts blogger network, which is incredible! Watch this space for links to my first blog post in December.
So today I’m catching up with the last of my summer makes (my excuse being I reckon this pattern might make a good party dress for the festive season!)
We had two big weddings to go to this summer: one of my very best friends in July and one where my husband was best man in August. So a special frock was required but had to be conducive to handling both kids on my own! No low neckline or tight skirt, thank you!
I bought the Vintage Rose pattern from Sew La Di Da last year at the Knitting and Stitching show in Harrogate so it seemed the perfect time to use it.
I found the pattern intriguing and a tiny bit scary! It’s the first time I’ve made a dress which wasn’t a bodice and a separate skirt section: this pattern has a front and back piece and then a side front and side back, all of which include the skirt sections. It’s also quite fabric hungry and, unlike many companies, it means it: creative cutting will not save you much yardage on this one.
I had an initial compare of the shoulder width to a pattern I know fits and decided to take nearly an inch out there before I started, using a tutorial from Love Sewing. I then started in on cutting out some seriously cute penguin fabric from eBay to make a wearable toile.

The pattern pieces fit together down the inside of each big box pleat: when making it up,you are the centre of the pleat together then you sew as normal down the bodice to a notch then switch to the longest stitch length to sew the rest of the way down, which means your pleats are sewn together until you’re almost finished. You then press the hell out of each pleats before unpicking the tacking stitches. I made both my versions in washable fabrics so it’s debatable how worthwhile this was but if you were working in dry clean only it would help you get the sharpest creases in the world!

The penguin dress is awesome and very wearable but it did highlight that there was rather too much room at the top of the neckline and that it was a little low cut for bending over little people all day: thank goodness for toiles!


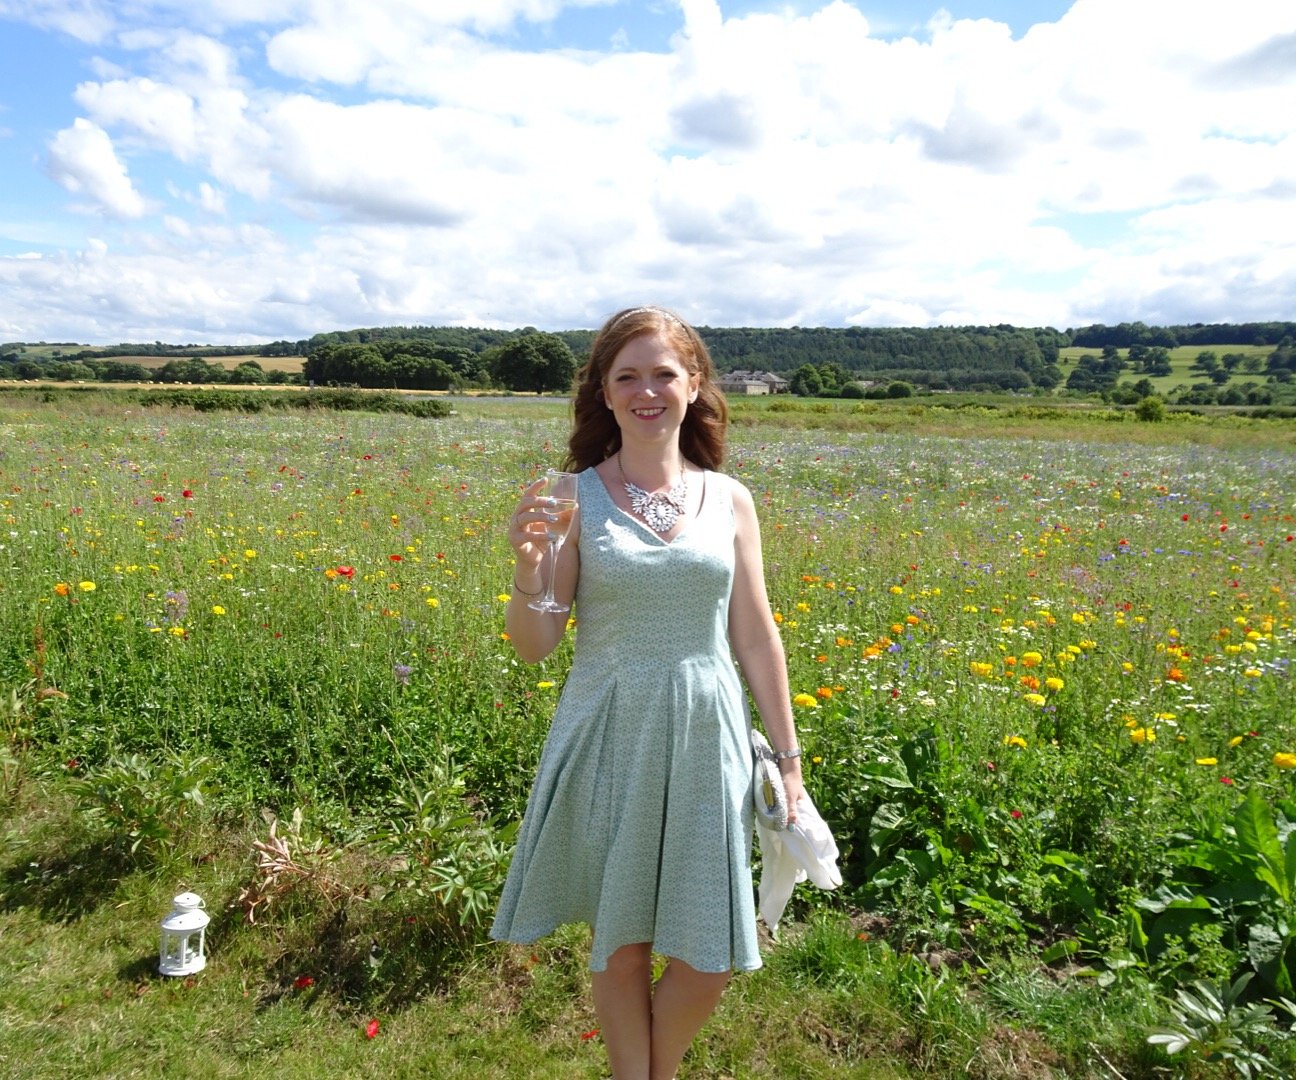
I pinched the excess out of the front bodice and the corresponding facing before cutting into my special fabric. This really is beautiful stuff. The lady in Fine Fabrics in Harrogate described it as a poplin : I think of it as almost nearer a brocade as the design is woven in so is slightly textured and there’s a little stretch BUT it washes : result! I agonized for a while over which side was the right side as they were both lovely.

Also, it was a perfect match to my Swedish Hasbeens, very important as one wedding reception was in a marquee in a field and we’d been warned against heels that might sink in!I
The only bit about making this which I really didn’t like was the finish on the shoulder seam. The pattern has you fully lining the bodice, leaving the shoulder seam unfinished and then slip stitching that bit as your final step. I started again several times in the penguin dress and still didn’t get a good finish. The green dress was even worse, as the fabric is quite stiff.
In the end, I hacked the lining into separate armhole and neckline facings, machines them on, pressed them to the inside and just hand stitched them to each other at the shoulder and on the seam lines to keep them in their place. I’m quite sure this is NOT what you’re meant to do, but I was out of fime, energy and fabric at that point so just ad libbed!
It left me feeling rather meh about the finished dress: much Instagram approval persuaded me not to go with my (now too big) RTW dress and in the end, I did feel good in it.

I think I wanted the fit and flare to be more pronounced than it was: the fault there is in the waistline of the wearer, not the dress!

So there you have it, it’s November and I’m caught up on my summer makes! I have a few more seasonal ones to catch you up on and some very exciting stuff on the cutting table: let’s hope I get time to get this poor blog up to date!
Becca x


Both dressss look great, lovely fabrics. I like the box pleats & how they add fullness around the hemline without bulky gathers at the waist. I made one almost the same shape from a 90’s Style pattern & wore with a net petticoat for a day at the races in the summer.
LikeLiked by 1 person
That sounds good! I did try it with a petticoat but it looked too much like fancy dress to me! Hubby was not impressed!!
LikeLike
I’m becoming a bit of a pleats convert – and yours are lovely!
LikeLiked by 1 person
Love the green/white brocade combination – brocade always looks brilliant in pleats. This pattern would definitely make an awesome Christmas party dress!
LikeLiked by 1 person
Thanks Janet! It’s a good excuse of a massively late blog post! 😳x
LikeLike
Gorgeous dress, better late than never! And happy new overlocker!! 🙂
LikeLiked by 1 person
Thanks, how’s the coverstitch going? X
LikeLiked by 1 person
It’s ace, been doing a little refashion on a pals frock today and did a rolled hem. Hubbies working away tonight so I can disappear into my cave 😘
LikeLiked by 1 person
Bliss! I’m in pattern tracing hell, was thinking of your love of this. I definitely don’t get it!!
LikeLiked by 1 person
Think of it as a learning curve, or send it round to me, I’ll swap it for cutting out 🙂
LikeLiked by 1 person