

Hello!
I’ve another catch up post for you today, so I’m afraid if you follow me on Instagram you may already have seen some of these photos. Sorry not sorry, I love these makes!
So a few weeks ago, my colleagues and I from Halifax trailed down to London for one of those lovely corporate volunteering jobs (we’re not short of opportunities for that in Halifax – have you seen Happy Valley? 😉 – but we’re part of a wider London-based department so it was our turn to travel). After a day and a half of “bonding” (and not a lot of actual volunteering work on my part, given I’d been driven into a few days earlier and had whiplash) I was more than ready for a little me time! So I went back as far as Kings Cross with my team, waved them off at the station, dropped my bag at the neighbouring Premier Inn and set off!
First call was to walk to Sew Over It’s Islington shop where I had a little browse, bought a little fabric (obviously) and then settled down to use one of their sewing machines and overlockers for a couple of hours.


I came to the conclusion this is a very, very good idea for any future spare hours in London for work. The studio space is lovely, everything was set up nicely, there was tea on tap and even a good soundtrack! I’ll share the make I worked on (for Beth) another time.
I then moved on to South Kensington (lots of nostalgia from my student days, as ever) and visited the Undressed exhibition at the V&A. I’d originally planned to go with the kids when we go down to see the Palace next month: clearly my brain had not processed this was an exhibition sponsored by Agent Provocateur! I thoroughly enjoyed it but there were some things I wouldn’t want to explain to a 5 year old (“mummy, why is that one’s bottom hanging out?”!!)

So that was Friday done and dusted. On Saturday I headed off to The Village Haberdashery for a course on making the Deer and Doe Datura blouse. I’ve admired this pattern from afar for some time: I even purchased the paper pattern a while ago but was somewhat intimidated by the cut out neckline so made other things first!
The course was taught by Rachel of House of Pinheiro, who is lovely, enthusiastic, a really good teacher and very tall indeed! The pattern and swedish tracing paper had been sent out in advance, so I’d traced off the sizes I thought I was between beforehand. I decided that I wanted help getting the sizing right: fit continues to be one of my biggest challenges, so I waited until the day to get Rachel’s opinion.
The course itself was pretty full on in terms of pace: I really enjoyed it, but there weren’t many lulls during the day. For me that’s a good thing: it means I’ve picked a course that pushes me somewhat, which is kind of the point! But I didn’t come out exhausted, rather envigorated.
As I’d traced two sizes nested within each other, Rachel was able to pin fit the pattern before I started cutting into my fabric, which was great. It’s not something I’d tried before and to be honest, I don’t know how much I could do on my own, as that would involve a certain amount of twisting and turning to see in a mirror, and that would mean it wasn’t hanging properly anyway… there’ll be a way around, I just need to find it!
Datura has two necklines, one with a peter pan collar and one with triangular cut outs. These are actually formed by the yoke piece having triangular notches in and then a strip of bias being sewn across the top to close the neckline. I wanted to make the triangular cut out neck, as I’ve made a number of collared garments before.
I’d found the neckline intimidating beforehand but actually, it was fine to make. The only thing I would say is that you should pin your bias in place and then try on before sewing. I didn’t do this, and I normally make a hollow chest adjustment. When I tried the finished garment on, there was a fair amount of gaping round the neck due to the bias being too long for me, even though I had spent a lot of time very carefully pinning to make sure it was flat and even before sewing. At home, I took over an inch out of the neckline to make it hang flat when it’s on me.
I picked up a number of useful tips on the course. For a start, I used a tracing wheel and dressmaker’s carbon paper for the first time, and it was fantastic! As all marking tools, I’m sure there’s a time and a place, but on my lovely Liberty cotton, it was perfect.
Rachel encouraged us to mark on not just the pattern markings but also the seam allowances on the yoke. This made sewing so much easier, particularly when finishing off the shoulders. It’s a trick I’ll be using again, with great delight!
The construction has you doing the darts, finishing the shoulders and neckline of the bodice, then doing the button bands down the centre back. You fasten front and back bottom pieces to the outer yoke, sew the side seams and then fasten the lining of the yoke on by ironing the seam allowance up, pinning and then top stitching from the right side. Rachel encouraged us to hand baste first to ensure the inside yoke didn’t move away from the topstitching and I love the finish this gives.
https://www.instagram.com/p/BH7WZPnh9SZ/?taken-by=houseofpinheiro
The really fun part of this pattern to me is picking the fabrics. For this first one, I chose a Liberty tana lawn for the lower part and ended up using a very lightweight cotton lawn/batiste/god-knows-what from The Shuttle at Shipley. It was extremely cheap when I bought it last year and I used it because I couldn’t find another match. Actually, it worked extremely well; as it was so light weight to start with, it was the perfect weight when doubled to hold the shape nicely and yet still be beautifully cool on holiday. Result!
I’d chosen contrasting orange buttons for the back as a fun touch; I realised when I got there that I needed premade bias for the neckline but thankfully there was exactly the same colour in the shop on the day; fate!


I absolutely love the finished top, I’ve worn it to work, casually with jeans and on holiday with shorts. It’s the perfect summer top. It’s smart, it’s cool, it’s high necked so I don’t burn quite so easily. In short, I love it.
In fact, I love it so much I made 2 more in time for my holidays! The first was using another Liberty tana lawn from Remnant Kings paired with a plain blue lawn from my stash. I chose plain blue buttons with this one and made my own bias from the blue lawn this time.
The finished top is actually a better fit than the first version and it still ticks all the cool and smart boxes, but somehow I don’t like it as much. I think it’s just because, as ever, paler colours just aren’t as “me” as the deeper ones. Hey ho, it still gets worn.

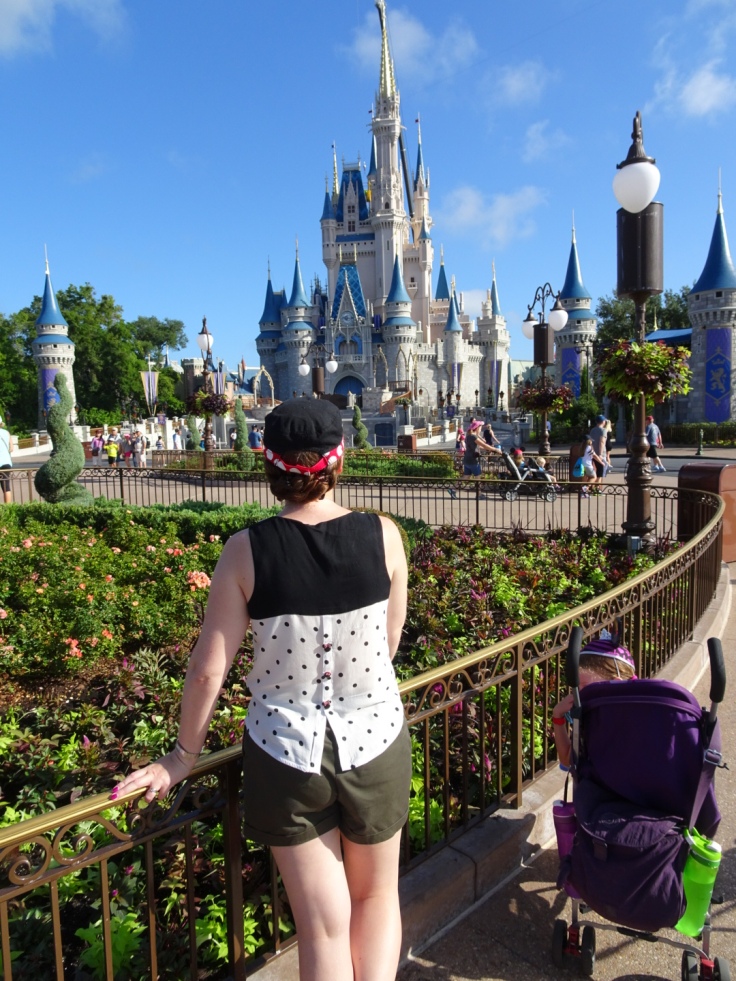
And the final version is a little different. Firstly, it has the peter pan colour rather than the triangle cut out neck. The fabric was from my shopping in the Sew Over It shop; both are beautiful rayons, so very drapey and light, perfect for this top. Secondly, instead of using the tasteful, polka dot buttons I bought at the same time as the fabric, I popped on some diamante Mickey and Minnie Mouse buttons (did I mention we were off to DisneyWorld?)


My original intent was to replace the “silly” buttons with the sensible ones when I got home; however it got such an enthusiastic response on Instagram that I’ve changed my mind!
I can see there being many more versions of this top in my future, although probably not til next year now. There are so many options for having fun with the fabric, and it’s not particularly fabric hungry either which is always a result!
Anyway, if you’ve made it this far, well done! And to finish off, just because I’m mourning my holiday, here are a few shots of these lovely tops in action on holiday in Florida. (and I’ll mention that it was extremely hot and humid, so I’ve looked better!!)


I’ve still got a few more makes in the queue to show you; I’m trying to stop myself diving into manic sewing again until I’ve got my stash and sewing area rather more organised so it gives me a little space to catch up here.
Hopefully I’ll catch up soon!
Becca x


I love the soft blue one, it looks like it’s mixed with a feather print? These are all nice tops – great pattern!
LikeLiked by 1 person
Yes, the Liberty fabric’s called Kerry’s Flight I think. Thanks!
LikeLiked by 1 person
I love this pattern but always avoided it because I didn’t understand the cut out neckline. Thanks for this it seems more logical now. They all look different but all useful. Loving the location pictures K xXx
LikeLiked by 1 person
They all look fab but I think my fave is the dotty one with the mickey and Minnie buttons 🙂. I think not changing the buttons is the right move too 👍.
LikeLike
These look fab – I debuted mine at the Sewing Weekender last weekend, looking forward to sharing it soon☺
LikeLiked by 1 person
Look forward to seeing it!
LikeLiked by 1 person
This pattern is a smash! Lovely makes.
LikeLiked by 1 person
Thank you!
LikeLike
What a nice post and what a great makes. Both tops looks very good on you.
LikeLiked by 1 person
Thank you!
LikeLike
Your tops are fab, I love all of them and you have a great eye for choosing fabrics. I’ve always always wanted to do one of these courses, they sound amazing but I live hours away (not helped by not knowing London at all) your holiday must of been wonderful, Disney is a dream.
LikeLiked by 1 person
Thank you very much! I’ve only been on a couple of these type of courses, both in London: I live in Yorkshire but with work insisting we were in London on a Friday (a day I don’t normally work!) I thought I’d make the most of it whilst I was there and the train fare was covered! Disney was indeed superb. Definitely a one off though!
LikeLike
All your versions are great. Particularly like the c cut outs neckline
LikeLiked by 1 person
Thank you! I do like that approach, just needed to try a different neckline for version 3!
LikeLike
My mother was a sewer so the pin fit was common, so funny. She would even do it with the cut out pieces. She taught us the basics, but it’s been a long time. I’ve only taken up pants and sewed a 20 inch long bed skirt in light velvet stretch, which I really enjoyed (because I had the time). Oh, all of your creations are beautiful. Thanks for the inspiration!
LikeLiked by 1 person
Thank you! What a lovely thing to say 😊
LikeLike