

I want to share two makes with you today, both different versions of the same pattern. I made the first as a (surprisingly wearable) toile and the second out of some seriously precious fabric which has been in the stash for a couple of years.
The pattern in question is the Sew La Di Da Vintage “Margo” jumpsuit. This brand’s patterns are all heavily vintage influenced, with the selling point being that they are in modern sizes so will definitely fit. More on that later.
The pattern features a princess seamed bodice leading into halter straps which tie at the back neck. A centre back invisible zip fastens it and there are two alternative leg lengths and two neckline shapes.

I bought the pattern from the designer a couple of years ago at the Harrogate Knitting and Stitching Show, and mum and I had quite a heated discussion with her because she was so passionate about the fact that it WOULD fit me because her sizes were modern high street sizes. I couldn’t seem to get across the point that part of the reason I sew is that I’m not a standard high street size! But the pattern is beautiful so I decided to risk it.
So let’s talk about the physical pattern to start with.
At £18 for the physical pattern, this is not a cheap purchase. It comes in a sealed lightweight cardboard envelope which is larger than standard format patterns and features black and white photography front and back. I managed to rip the envelope slightly when opening which was disappointing but not a crisis.
The pattern itself is printed on heavy weight paper with the different sizes in solid coloured lines. I’m never sure about using such heavy paper: personally I’m a tracer so it’s no big deal to me, but I always feel like super heavy paper would be a pain as you can’t see the pattern through it if you were trying to pattern match.
To me, the pattern booklet was a massive disappointment. For a start, it’s all black and white. Sorry, but if I’m paying £18 for the privilege, I’d like more attractive instructions. More seriously, the written instructions are not clear at all, frequently not telling you which area of the pattern you’re working on and not labelling or describing the relevant pattern pieces. And the black and white photography is all of plain white fabric; combine that with poorly worded instructions, a tendency to not even mention right or wrong sides together and photos which have been rotated to fit into the smallest space and I had a fair few head scratching moments pulling this together. If you’re a beginner, I’d walk away from this pattern for some time to come!

Anyway, let’s talk about the garments.
I made my first version in an African wax print I bought online. I didn’t realise when buying it quite how shiny the gold bits on it are! So I wasn’t expecting this to be a very wearable toile.

I graded between a 10 and 12 on top and did a straight size 12 to start on the bottom half. I did add my standard 1.5cm to the centre back seam.

The main problem with assembly was the terrible instructions. I pulled this together at the Tees Creatives weekend with Sally, Vicky and Carol and obviously passed the instructions round so it’s not just me who thought they were dreadful! Other than that, the pattern is well drafted and comes together nicely.

I did have one last cause for amusement though. That claim that it would definitely fit me? Well, yes, that’s going to happen when the instructions for the centre back zip insertion involve telling you to get someone to pin you into it and mark exactly where the zip needs to go. I mean, it’s one way of doing it but let’s hope you’ve not got a pattern you were keen on matching!
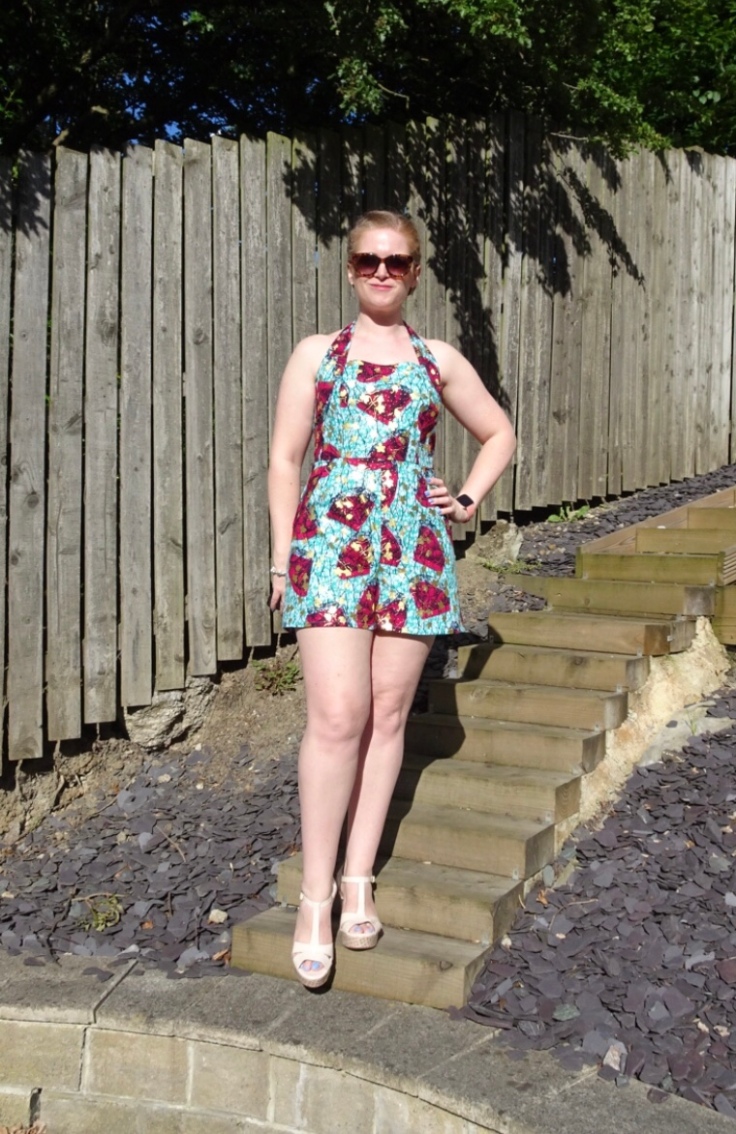
I’m surprised by how much I like the finished article, given the loudness of that print! But I do. I feel fab in them and there’s definitely a strong vintage feel.
So on I moved to my second pair, in some very precious linen mix fabric which I think is ex Ralph Lauren. Certainly there’s a few makes floating about on Instagram in it (Roisin’s being a favourite of mine!)
I tried to cut into this for this pattern last summer but didn’t have enough fabric whatever I did (it was quite narrow). Heather’s came to the rescue and sent me her offcuts, so they’ve been carefully stored until now.

You can see that the trouser pieces in particular are MASSIVE. That would be far less annoying if, when made up, this hadn’t happened:
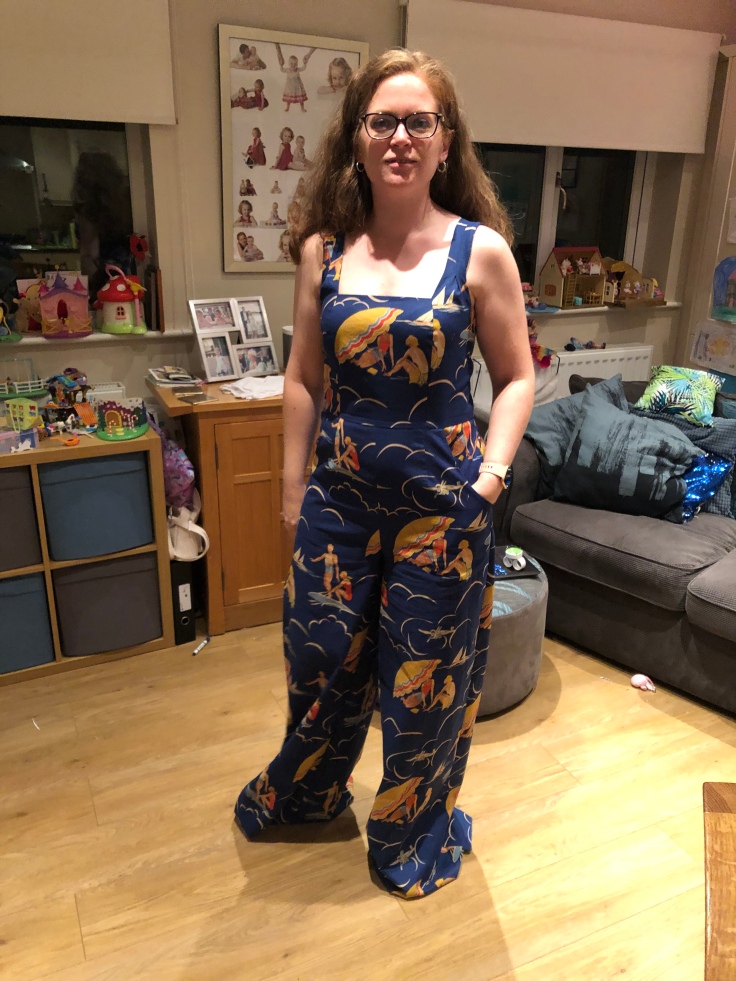
Bear in mind that I’m 5’7″ and I’m wearing a mid height wedge heel here. And I’m still walking on the trouser bottoms by more than a few inches!
This is seriously precious fabric so this really annoyed me. I do not normally have to make adjustments to leg lengths at all, it’s very rare indeed and frankly I probably wouldn’t have needed Heather’s very kind fabric gift if I’d known quite how ridiculously long those legs were. So my biggest recommendation here would be to measure the hell out of those pattern pieces lengthwise before you start cutting!
I made an adjustment to the pattern before cutting my second version. I do really like the look of the halter neck: what I don’t like is having to wear a strapless bra. I really hate them! So I adjusted the pattern to make this a normal strap.
I did this by trying on my toile and working out at what point I needed to straighten out the side front bodice piece and pinning it to work out how much fabric to remove. I also got help pinning the back piece where the revised strap needed to meet and placing a corresponding pin into the strap itself to show how much shorter it could be.


I marked the seam allowances on a new copy of the side front bodice and then cut from the underarm to the opposite side’s seam allowance, and from the opposite side onwards through the seam allowance to form a hinge as shown above. I removed the necessary amount of fabric from the underarm seam and smoothed the curves on each side.
The bodice is self lined so I changed the construction slightly: when attaching the back bodice lining to the back bodice, I stitched from the side seam only as far as the point at which the strap met the back bodice. I then firmly attached the straps to the lining piece with my machine, very close to the seam allowance, then hand stitched it closed. There’s probably a better method, but it seemed to work ok.
So, apart from the 6 1/4″ hem on those trousers (!!!) after I’d removed a couple of inches from the length, this pair came together pretty well.

The fabric was lighter weight than the wax print and didn’t feel as robust so I didn’t fit the bodice quite as closely as before. Which isn’t the worst thing in the world in Florida heat and humidity! The strap adjustment I’m pretty pleased with: it could use a tiny tweak here and there but I’d have bought this in a heart beat if it were RTW so who cares?
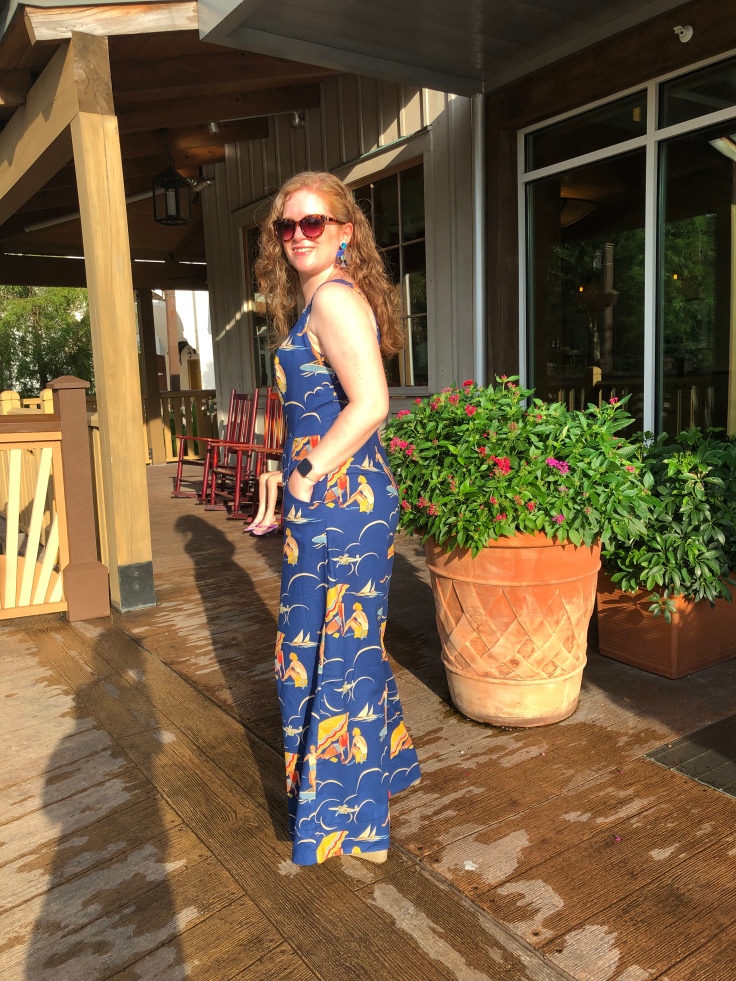
I’ve got to wear this once this holiday. We haven’t been eating outside our resort as much as usual in the evenings (too tired!) but the evening I did wear it was perfect.

It turned out that the restaurant I’d booked purely by checking that the menu included anything my daughter would eat was an Art Deco themed masterpiece based on an airport departure lounge of the very classiest type; couldn’t have been more perfect!

There was the slight issue of my getting the trouser legs sopping wet in a delightful Florida deluge on the way there, but they survived!

They were absolutely perfect for dinner: comfy but stylish, and the slightly looser fit in the bodice allowed for the extra food I’ve been enjoying over here 🙈 I’ll have to be good when I get home, but we’ve had some memorable meals!

So, if you’ve got this far, well done! On balance I do love this pattern, but more for its style lines than for the instructions and pattern itself. But I’ve got two garments which I totally love, so it’s a winner in the end!

Also, my favourite Aunty is Margot, so there’s that in their favour too!
Do you see vintage style jumpsuits in your future yet? 😉
Becca x
Details:
Pattern: Margo jumpsuit by Sew La Di Da Vintage
My measurements: bust 36″: waist 32″: hip 42″
Size cut: 10-12 on top: 12 for legs
Fabric: African wax print /linen
Adjustments made: added 1.5cm to centre back rise on both; converted halter strap to straight on long legged jumpsuit
Future adjustments: tempted to further shorten the strap but nothing major
Make again: Potentially; love the style but don’t know how many I need! Watch this space!


Thanks for sharing your thoughts Becca. I remember the Wax print Margot from Teescreative, and I’m so pleased you managed to whip the pattern into shape! Both jumpsuits are fab!! But I especially love the vintage print ones!
LikeLiked by 1 person
Thanks Carol! I got there in the end but there was still a fair amount of swearing second time around! 😂
LikeLike
I love both of these outfits! The fabrics are perfect for the style, and you have created two completely different looks from one pattern. They look gorgeous!
LikeLiked by 1 person
Thank you! I’m surprised how much I love both fabrics in the end!
LikeLike
Both great versions and I love the fabrics you matched to both of them ;o)
LikeLiked by 1 person
Thank you!
LikeLike
I’m sorry the process was frustrating, but WOW! The result! You look like a glamorous starlet on vacation!
LikeLiked by 1 person
Aw, thank you!
LikeLike