Hello! So I’ve finally done it – I’ve stuck to my good intentions and made the same pattern twice in a row to perfect the fit! And I’ve continued my quest to improve my skills with stretch fabrics – go me!
Let’s rewind a little, shall we? I’ve been admiring the Grainline Linden since it popped up in my Bloglovin’ feed some time ago. It’s the perfect blank canvas to me, plus it fits in a lot better with my working mummy wardrobe than some of the pretty dresses I’ve made over the last year.
However, it’s clearly a stretch fabric. Which scared me off.
Then I won £10 from the Village Haberdashery by completing one of their CAB surveys so decided to treat myself. That was some time ago – still scared of the stretch!
Then it was summer, it was too warm for jumpers….. you get the picture. Procrastination!
In late August, I made my first trip to Fabworks in Dewsbury and was overwhelmed by the range of lovely, stretchy fabrics. And so I finally bought some fabric to make the Linden.
And got scared because it was too nice to use! Am I the only one that does this? Get intimidated by the pretty fabric to the point where you don’t want to cut into it?
Last time I was in Manchester, I went to Abakhan and picked up two lots of embossed scuba (or so the description said) I could instantly see the cream fabric as a luxe version of the Linden so decided to dive in and make this my wearable toile.
And it’s a success! Wanna see?

Styled with a leather jacket and statement necklace, I feel properly stylish, and yet still comfy and practical – result!
(This may be a rather picture heavy post – I’d apologise but, it’s my blog and I want to preserve all the pics!)
I have to admit that I still haven’t taken the overlocker out of its box – this was entirely made on my sewing machine, using my new, shiny walking foot (which I love!)

The photo gives you more of a close up of the scuba fabric – it’s a very textured finish and doesn’t feel like other fabrics I’ve bought described as scuba but that’s what the label said.
I used the lightening bolt stitch on my machine
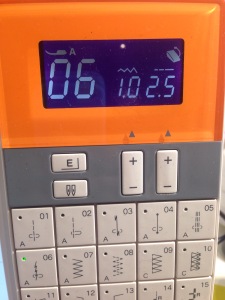
You can see the shape of this stitch more clearly on the second fabric I used

In terms of the pattern, I traced a size 8, grading to a 12 on the hips only which worked perfectly. I’m really happy with the fit – not so loose it feels scruffy but not so fitted I’m self conscious.
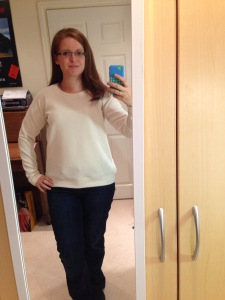
I’m really pleased with the neckline in particular, it’s sitting beautifully other than one tiny bit which is a tad bumpy. Considering how much I had to pull at the neck band whilst stitching, I’m happy with that!

The only thing that was a bit of a nightmare with this was its total imperviousness to the iron – there was absolutely no point in pressing anything, it made no difference whatsoever, so I ended up doing a lot of smoothing and stretching with my hands as I was sewing. Plus side of that is it shows no visible signs of wear (unless you lean on something less-than-spotless – I’m not sure cream is entirely my colour!)
As you needed to stretch the bands around neck, wrists and hem to match the size of the main fabric, I ended up using a LOT of pins. And the go-slow button on the machine. But even with all that, it took under 2 hours to put together, which is a result in my eyes!
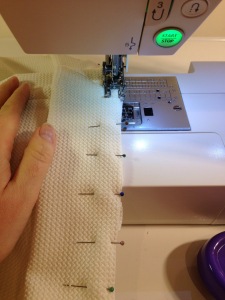
Having done so well with the first one, I got brave and decided to move on to the lush fabric.

This is it – I bought enough of this to do the body and then black ponte (?) to do the sleeves and bands.
My first problem was that whichever way I laid the fabric out, it looked as though it might possibly be upside down! Eventually, I decided to just crack on and aim for the prettiest colours.
This then led to fun and games with cutting – I obviously wanted the nicest bits of the print to be straight down the front of the bodice. I toyed with cutting on the fold, but in the end I laid the fabric out flat and flipped the pattern piece over from left to right to cut – rather scary but it seems to have paid off!

As you can see from the photo, this fabric rolled at the edges. A LOT! This was a first for me, I’ve purposely avoided anything other than the most stable of stretch fabrics before, largely because I watched the lovely Jen struggling with the stretch fabric she’d chosen on the Coco workshop I attended and got scared! But the print on this was just too pretty to leave in the shop so I purposely ignored my fear.
Cutting done, it was all going smoothly. I even got a little bit smug and decided to add some extra topstitching where the sleeves join the bodice to keep everything neat inside and out (an effect I’m still happy with – the pattern recommends the topstitching around the neckline but not on this line)
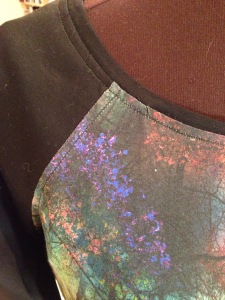
Then I sewed the neckband on to the wrong side of the fabric and didn’t notice until I was just about all the way around the neckline!
Unpicking a lightning bolt stitch was a new experience. It’s not one to repeat, if I’m honest!
Then I needed to change the bobbin thread and suddenly, whatever I did, the machine was making massive loops of thread underneath the fabric. NOT happy at all! I unpicked a further twice before accepting that something must have gone wrong when the machine was winding it, pulling all the thread off the bobbin, throwing it in the bin in a strop and starting again. Problem solved!

Still, the end result was worth it! This is a much, much lighter weight fabric than the first one and I think it really shows in the drape and fit of the garment, but I don’t see this as a negative – I like them both in their different ways.
Here’s a few more photos, in case you’re not totally bored already!


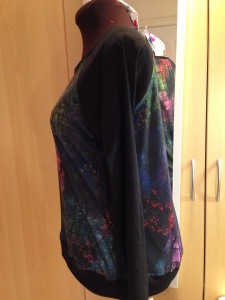

The final outcome is a very happy me with two quite different tops – the cream version I can definitely layer over other things for warmth and it feels very snuggly on. The “tree” (?) print version is more of a top really but none the poorer for that.
And I now have serious plans for the deep pink version of the funny cream “scuba” I bought at the same time – I’m so glad I had no will power and bought both versions!
Are there any patterns you just had to dive into and make again straight away? And any recommendations for other quick sews to augment my casual wardrobe? Once I’ve made a few party things for Christmas, obviously! 😉
Becca x
PS with epic timing, Fabworks have launched their online shop today and there is some of the tree print jersey on there – apparently it’s called Dark Forest!


These are great. The tree one is particularly beautiful. I have just bought this pattern too, really looking forward to finding the right fabric to have a go.
LikeLike
Thank you! I’m really pleased with them, look forward to seeing your version
LikeLike
Two fantastic tops! That multicoloured tree fabric is spectacular!
LikeLike
Thank you!
LikeLiked by 1 person
Is it a photo they have printed on? Looks really good. I am SO with you on all the pretty dresses. During the summer I had been able to get into get into the habit of Me Made almost every day but since it’s turned chilly – nothing! I think our overlockers would be friends!
LikeLike
I very nearly got the Overlocker out last night but then realised there was no ironed school uniform ready 😕 I think it is a photo, it’s that kind of quality of image. I’m definitely planning another Linden or 3, it’s so satisfyingly wearing something snuggly you’ve made!
LikeLike